I think we all had a friend when we were kids who had the crazy ability to produce intricate designs and pictures on the plastic red toys — mainly because they spent hours working on their talents, manipulating those little white knobs, erasing and re-drawing until they were rewarded with the perfect geometries.
The drawing device, which works basically with aluminum powder and an internal stylus directed by the chunky knobs, has gone through a number of modernized versions and facelifts since it was delivered as an instantly popular toy to the public in the ’60s. Now, Evan Long, a hacker and maker with a great deal of ingenuity and resourcefulness, has come to our rescue with the plans and details for a motorized Etch-a-Sketch that has magical results you can attempt to recreate yourself — and blow minds at that next party, no matter how old the guests are.
Long shares with you her plans, employing Arduino software, to turn that Etch-a-Sketch hiding in an old toy box into a true work of art, scribbling off the Mona Lisa right before your eyes.
The Arduino controls two stepper motors attached to the areas where the knobs normally go, and uses simple Python script to upload .pngs to send vector art through the software.
While there are a number of steps to go through to reach the goal, the parts list is pretty simple: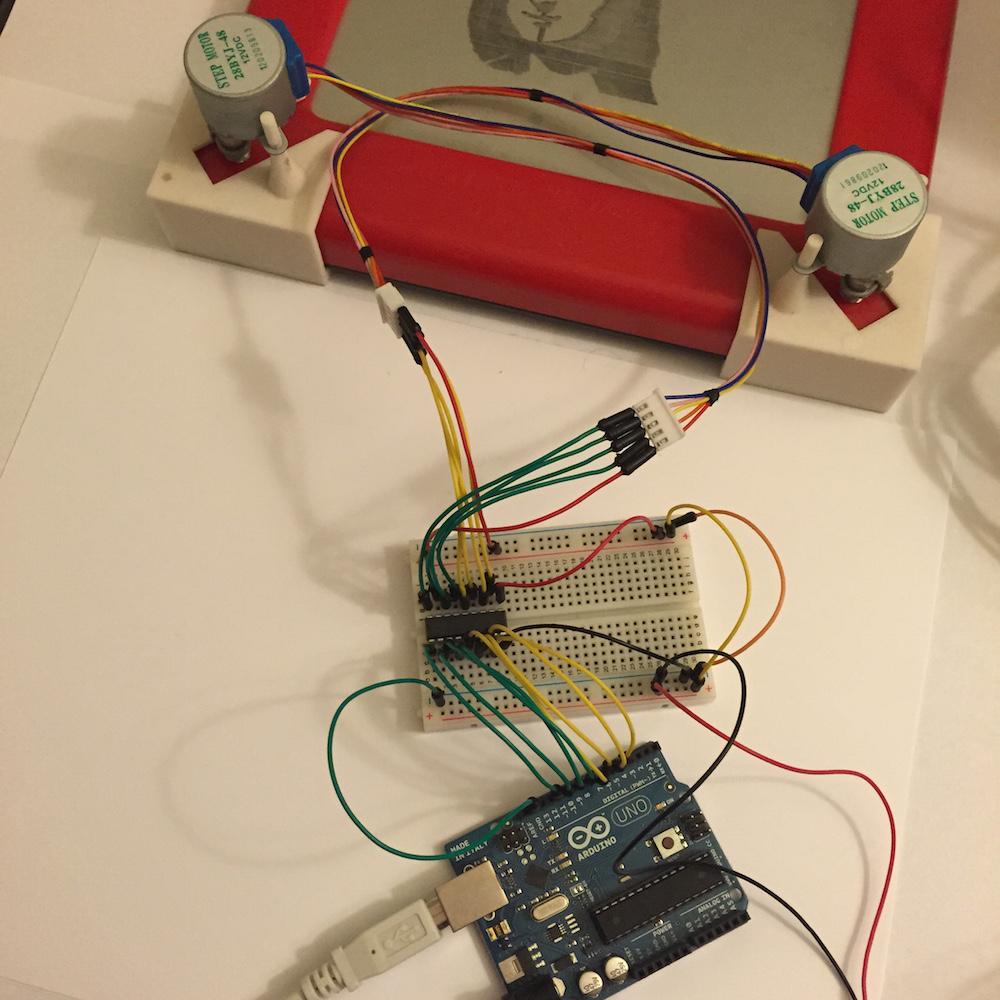

- Etch-a-Sketch
- Arduino UNO
- Two stepper motors
- 12V Power Supply for stepper motors
- ULN2803
- Breadboard
- One foot of rubber tubing with a 3/16” inner diameter and outer diameter of about 5/16”
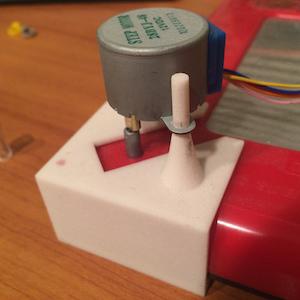
- Two 3D printed motor mounts, with Sandstone materials recommended
- Small zip ties
- Gorilla Glue
- Breadboard wires
Long pried the knobs off with a screwdriver and then attached the motors with rubber tubes and Gorilla Glue. Motor mounts were 3D printed and customized, situated just above the traditional knob areas, with the ULN2803 used to switch to the 12V for the motors. The table below shows you a description regarding the Arduino output pins, the ULN2803, and the motors.
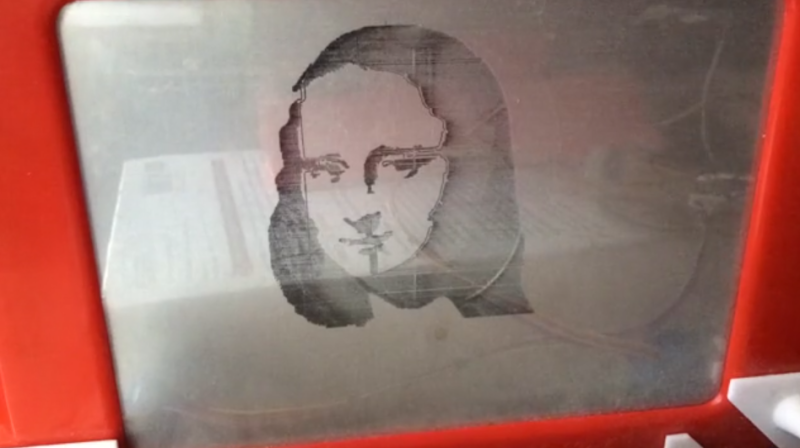
With all the source for the software listed here for you on github, Long installed the SketchTheEtch.cpp on the Arduino, using Python script, with the Arduino firmware receiving vectors for drawing and tracing. Resolution is recommended at 500 x 320, but can actually reach a maximum of 550 x 370, with tracing starting at the top and working left to right.
While the example with the Mona Lisa is exciting (be sure to check out the video below), Long emphasizes that this project alone doesn’t provide you with a way to convert images, and while you can use code to do it, some images may require manual editing.
Have you used 3D printed parts to create anything like this? Tell us about it in the New Etch-a-Sketch forum over at 3DPB.com.
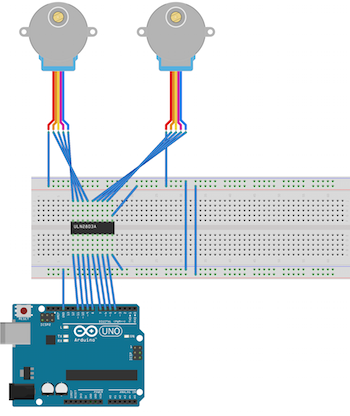
Layout bread board