3D printing may soon make the time-honored craft technique, paper mache, obsolete. One Thingiverse contributor decided to forgo the mess and fuss of paper mache for the no-waste efficiency of 3D printing when he designed and printed a tunnel for the family model train set. Arjun Mehta, known as “coolarj10” on Thingiverse, is a California-based bioengineering student and 3D fabricator. When his father proposed adding a tunnel to the Mehta family’s holiday Lionel train set, the young maker offered his 3D designing and fabricating services.
T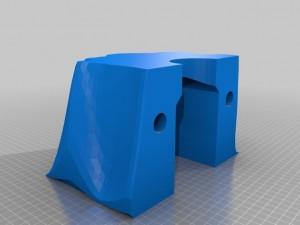

The tunnel, which is 224 mm wide, 290 mm long, and 140 mm tall, was actually designed to be 3D printed in two separate pieces — a front and a back. Mehta used the 3D design open source software Blender to create the sculpted tunnel that looks convincingly like a roughly hewn, rocky, snow-covered hill. The passageway has a curved top with plenty of clearance for the model of Lionel trains in the family locomotive set.

In his original design, Mehta included holes in each piece so he could connect them with pins to create a single, finished piece. He also designed a 70 mm hole in the top of the tunnel so that a plug could be fitted to power decorations on the summit of the tunnel-hill. When printing with his MakerBot Replicator Dual, he inserted a support on the bed as can be seen in the short portion of the video he shared. He recommended using the MakerBot Desktop PLA low resolution (fastest) printing settings with the exception of the 5% infill. In the first version of the tunnel, the layer height was 0.3 mm and he kept the plate at a temperature of 40°C. It took around 13.5 hours to print each piece and used just under 2 lbs. of filament.
After completing the tunnel and installing it on the tabletop winter wonderland, Mehta shared his design and STL 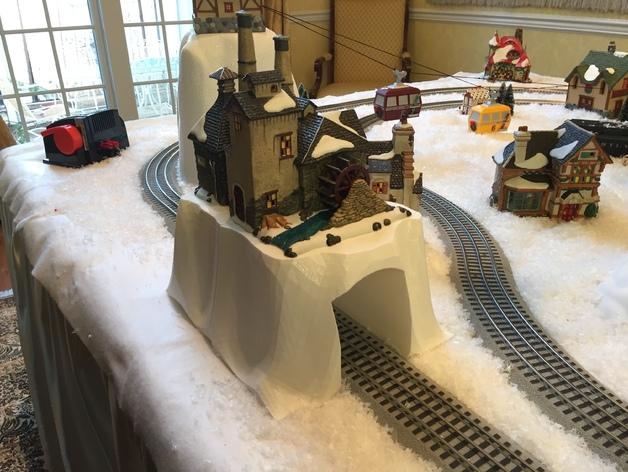
What do you think about Mehta’s project? Would a 3D printed tunnel liven up your train set, or maybe your children’s play sets? Let us know if this is a Thingiverse project that you like over at the 3D Printed Model Train Tunnel forum thread at 3DPB.com. Check out the video below to see the train set in action going through the tunnel, and starting around the 1:30 mark a look at the tunnel being 3D printed.
