Instructables User 3D Prints a Biplane Without a 3D Printer… Huh?
Brittney Sevenson
I’ve heard people refer to 3D printing as ‘automated hot glue gunning.’ Basically if you think about it, they are somewhat right when referring to FFF/FDM 3D printers like the MakerBot Replicator line. When the 3Doodler first came out, the comparisons to hot glue guns were even more incessant. In fact I myself even referred to the 3Doodler as a ‘glorified hot glue gun’ in the past. This was of course until I used it myself and saw others using the device to create objects which a hot glue gun certainly couldn’t even come close to producing.
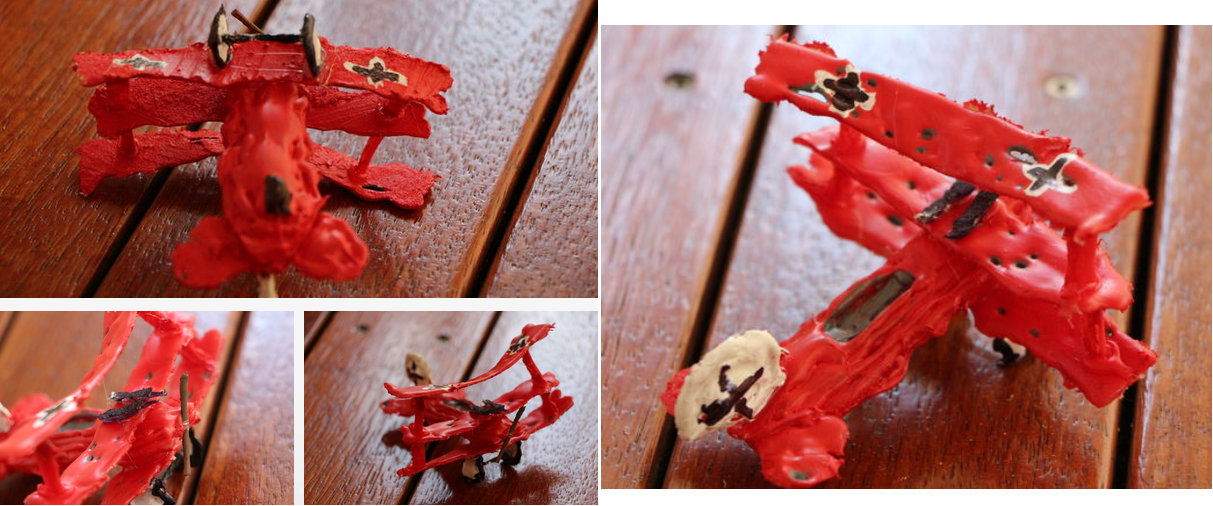
To take this glue gun/3D printing comparison a step further, one Instructables user, going by the handle Kiwi4269, decided to “3D print” a Red Barron biplane without using a 3D printer. Huh? That’s right, instead of a 3Doodler or an automated 3D printer, he decided to use simply a hot glue gun along with some paint.
The World War I plane, equipped with tiny machine guns and all, would be a difficult enough project to undertake with a 3Doodler, but Kiwi469 didn’t have one at his disposal.
“Since the 3D printer first came out I have always wanted one, but I haven’t decided to buy one because of the expense,” explained Kiwi4269 on his Instructables page. “I have found a way around this barrier. The way I have discovered uses the hot glue gun.”
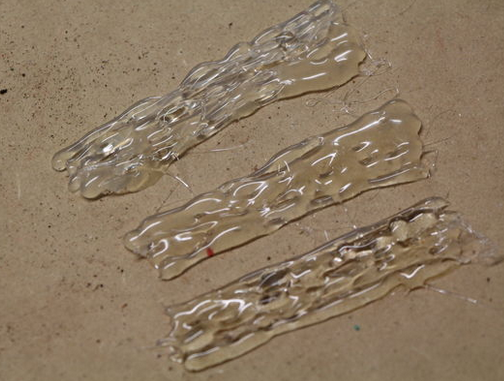
To start, all he needed was a few simple items. These included a hot glue gun, glue sticks, a paintbrush, knife, and red, black, white, and brown paint. He started with the the three wings, placing five lines of hot glue down on a clean surface, then allowing the glue to dry. From there he turned his attention to the fuselage of the model aircraft, making it longer than each wing and rounding it off by filling in the gaps between each line of hot glue, placing a gap on top for a cockpit area. At this point he created the rounded tail flaps, then glued those flaps onto the fuselage.
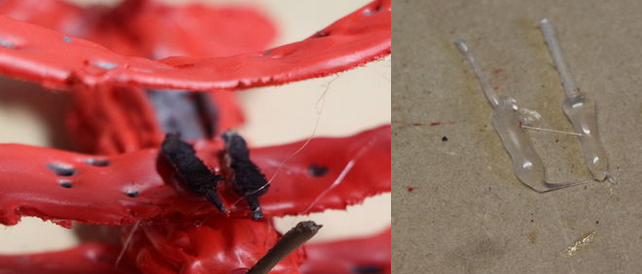
The wings now needed support, so all that he did to tackle that issue was create a couple of small lines of glue, and once dried attached them to the wings, connecting them around the fuselage. The entire body of the plane was then painted red, prior to creating the propeller, wheels, and machine guns. The propeller and machine guns rellied on thin strips of glue. With the guns, however, once a thin strip dried, he made a thicker strip, placing the thin strip slightly inside it prior to drying. The wheels were a bit more rough, as it’s not easy to create perfectly round objects with hot glue since the glue tends to run a bit prior to drying. Because of this he was forced to used a cardboard template, a straw-like object, to form them with. Once these parts were dried, the propeller was painted brown, the guns black, and the wheels black and white.
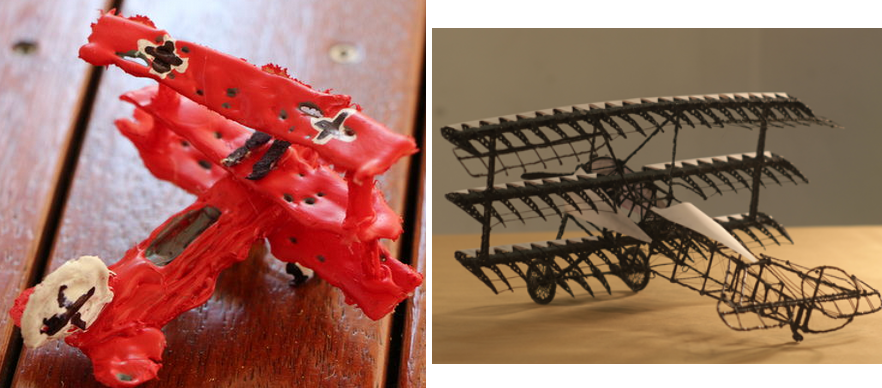
Overall the plane turned out better than I would have thought. With that said, it doesn’t come close to a recent biplane which was produced using stencils and a 3Doodler pen. Check out the side by side comparison below:
What do you think about “3D printing” with a hot glue gun? Is this how you’d expect such a project to turn out? Let us know your thoughts over at the “3D Printed” Glue Gun Biplane forum thread at 3DPB.com.