Before the 3D Filament Splicer, joining filament by hand was the only option, and it was a rather awkward process. This process often produces unstable joins which can get stuck in tube or break in stressful printing situations.
There’s quite a difference between hand-joined filament and filament spliced with Artesea’s 3D Filament Splicer (see below photo). Smoother effects are achieved in four simple steps: 1) Cut pieces of differently colored filament; 2) Heat up filament piece ends; 3) Join together pieces; 4) Feed new multi-colored filament into your printer.
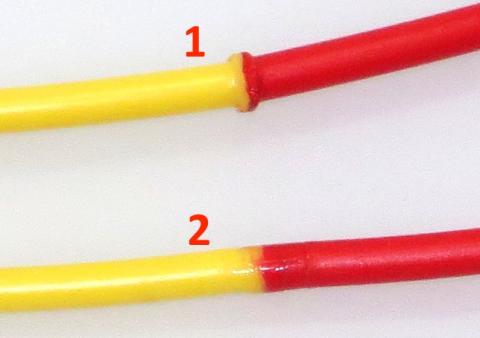
Difference between (1) hand-spliced and (2) Artsea’s 3D Filament Splicer. (image: Artesea)
This user-friendly and parts-certified 3D Filament Splicer is designed for functionality, and it looks like a cross between an old cassette player and a large cigar box. It has many solid features that should excite people looking for a little more color in their creations, including: an ergonomic footprint; suitability for 1.75mm to 3mm filaments, up to 235c; heater and cooling blocks made of precisely milled, Swiss made, pure copper for quick heating and cooling; and a 110 and 220v voltage capacity.
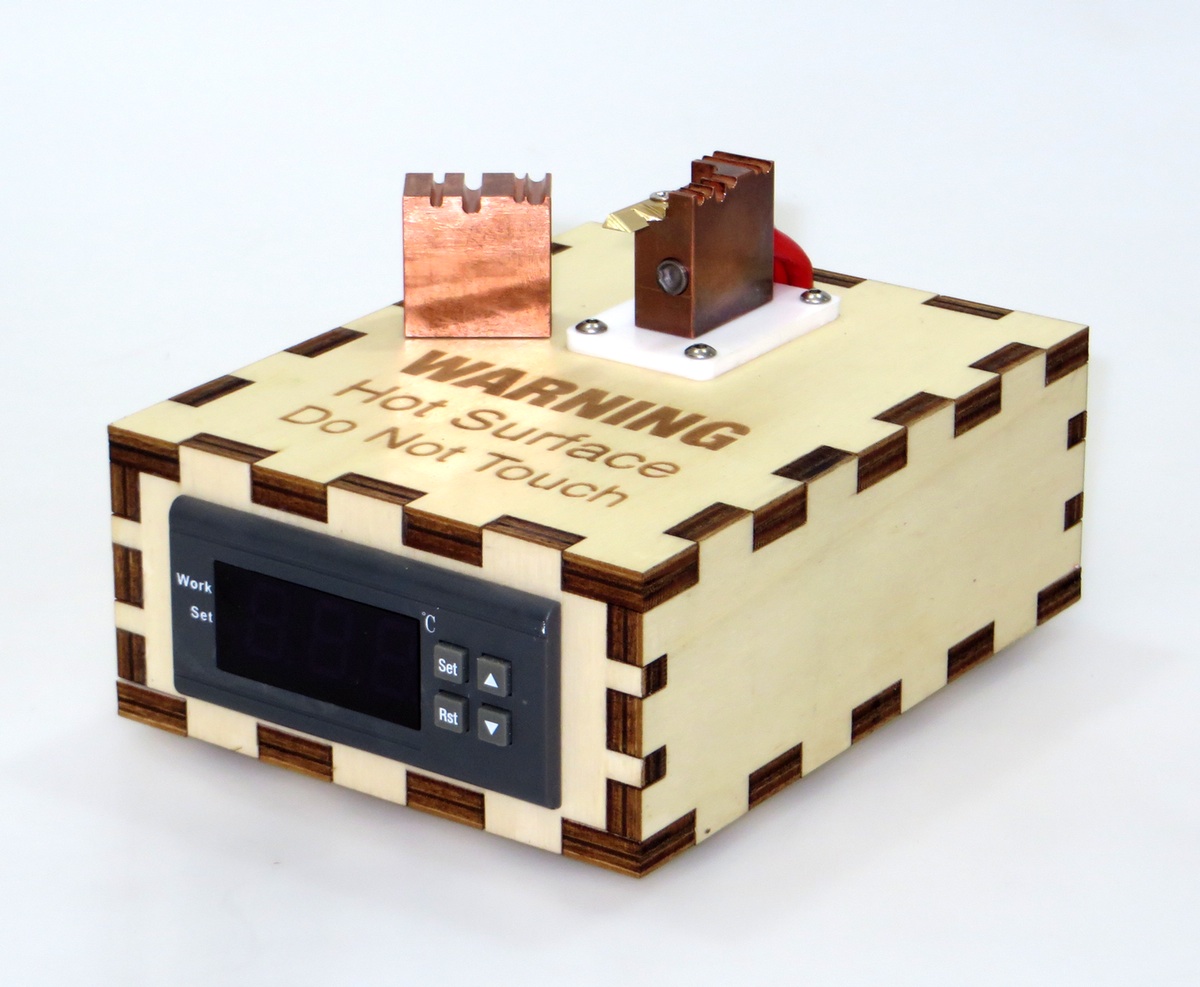
The 3D Filament Splicer (image: Artesea)
Now that we know the basic design concept, how do we actually use it? It appears rather easy, so long as you understand the basic directions. The directions for small and long pieces of filament are slightly different because long pieces can’t be rotated with fingers. For both small and long pieces of filament, you hold filament pieces in both hands, and touch heating block with filament ends for 1 second. For small pieces, you will join pieces on heater block, rotate filament ~360 degrees to remove excess plastic, and remove piece to cooling block groove while continuing to rotate.
For larger pieces, you will heat and then push filament into cooling groove, so excess plastic forms bulge above joint, and wait for 3-5 seconds. The big difference here is filament size. With smaller pieces, rotation ensures proper joined filament diameter, and with larger pieces, excess plastic needs to be cut off using a knife.
Either way, it seems simple enough. In about 20 seconds, you have joined differently colored filaments–presto! Make a rainbow in a few easy steps.
You can pre-order the Splicer assembled, for $190, off Artesea’s website, or order your own DIY kit for $140. Just think of what you can make on your 3D printer, once you’ve conveniently spliced your filament using a handy device like this one! Discuss this new machine in the Artesea Splicer forum thread on 3DPB.com.