Creality CR 10 V2
Along with competitors Anet and XYZPrinting, Creality form a trio of manufacturers that dominate the low-cost 3D printing segment. Only a few years ago 3D printers under $500 were rare, but these firms have made them accessible and have sold hundreds of thousands of them.
In this segment, there are often a lot of issues with print quality and printer reliability. The Creality CR 10 v2 is the upgraded version of the very popular CR 10 and retails for around $500. Creality in the past has also had quality issues and even some safety issues with some components and models. The CR 10 was known to in some cases catch fire. Subsequent safety improvements have made Crealitys safer. We would not recommend running these types of machines unattended, however. Whereas Creality machines tend to work well out of the box, low-cost components do mean that after a few months you will need to replace components.
After testing it for over 100 hours of print time, we can conclude that CR-10 V2 is a value-engineered machine with a large build volume that works surprisingly well.
Unboxing and Set Up
Unboxing is easy and there is some assembly required. This process is simple if you follow instructions. You can find a video showing you how this is done. Most people should be able to do the assembly and set up of the printer.
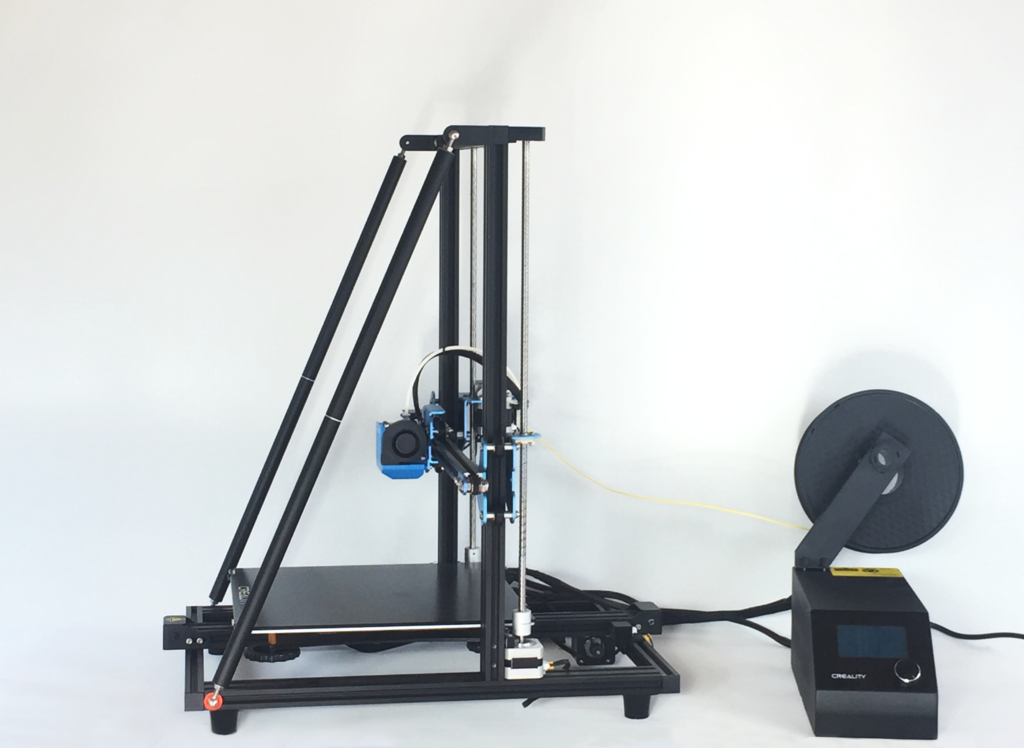

The printer has a separate console for controls. For some this may mean that your printer takes up more space on your desk but it could also make it more accessible because you could place the console closer to you. Physically separating the main electronics and controls from the motors and frame could make the machine safer though, so that’s a positive. The filament is placed on top of this console, this seems a bit weird initially but works ok. When running the printer for a long time this does mean that you can prevent tangling by placing your filament spool at the correct angle. You can also place the spool closer to you so you can easily see if there is tangling or problems with unspooling.
Controls
Controls work through a wheeled button. It is easy to navigate through the menu screens. Do not confuse easy with intuitive, however. Menu structure and operations are far from perfect and can be time-consuming and confusing.
Structure
A nice design element is that it has an extra set of diagonal arms that gives the printer more Z-axis consistency. These arms also make the printer more stable overall and seem to have a handle in improving print quality generally. These arms also help when moving it to a new location. The arms make it much more steady overall and makes it is easy to grasp, move and re-position. Build quality on parts looks better than previous models as does overall attention to details such as cable placement. Machined parts also look like they’re better quality than before.

Operation
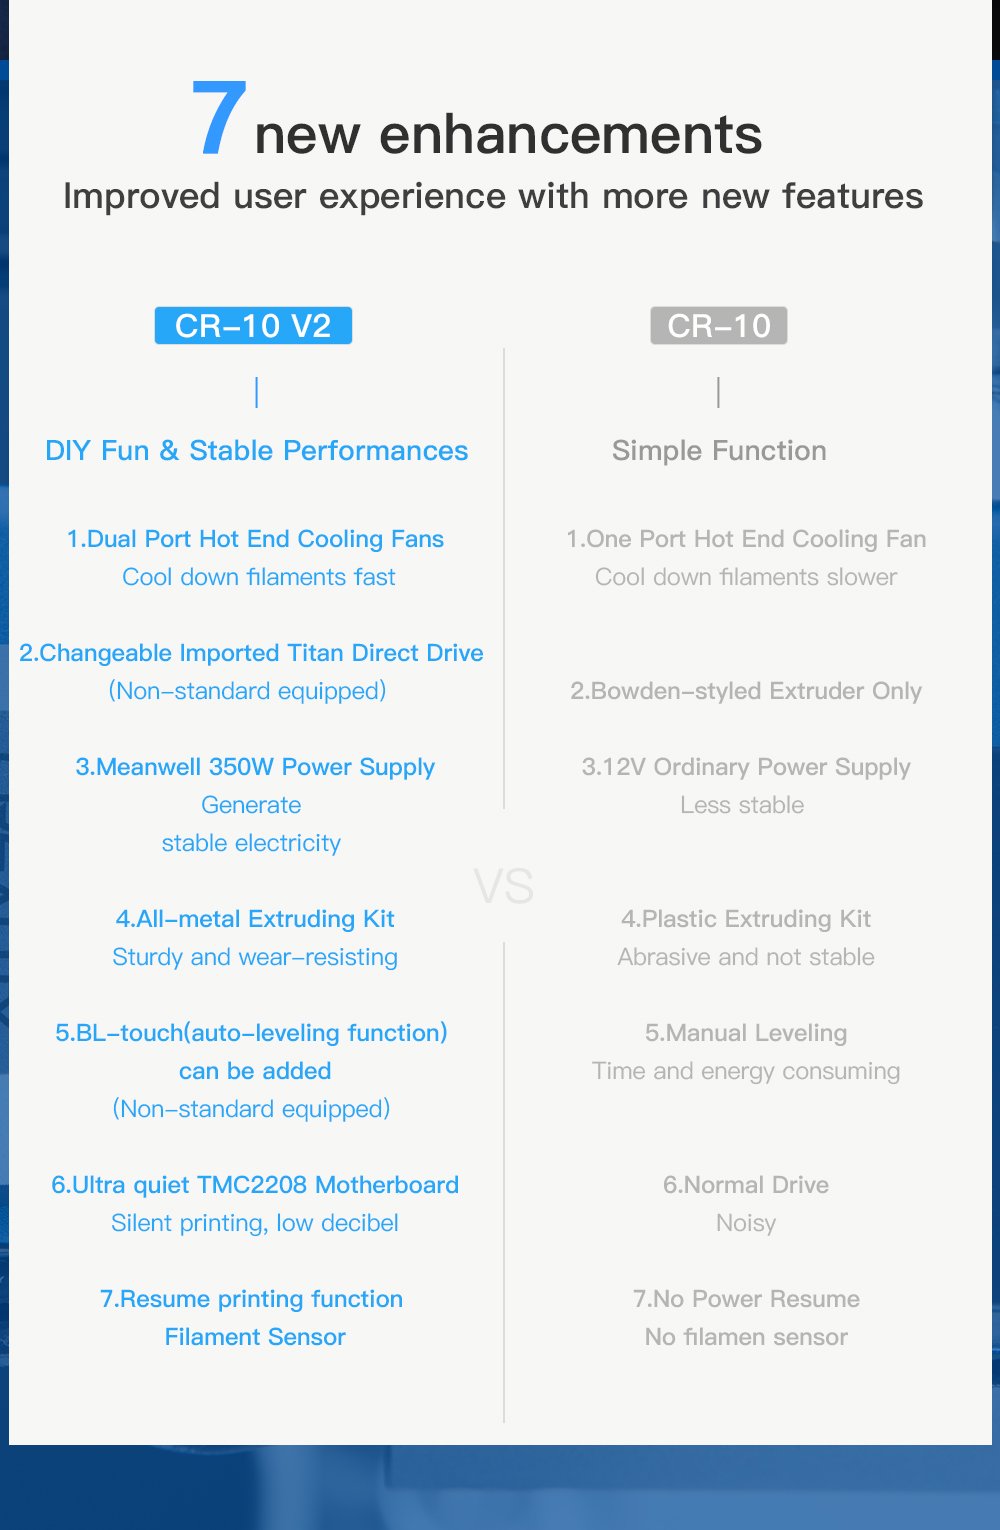
The ultra-quiet TMC2208 motherboard does not make the printer that quiet. It is actually annoying if you work in the same place that you print. The printer sounds like an old PC and is much too loud. This is an important point for me and actually made me use the printer less often than I would have liked to.
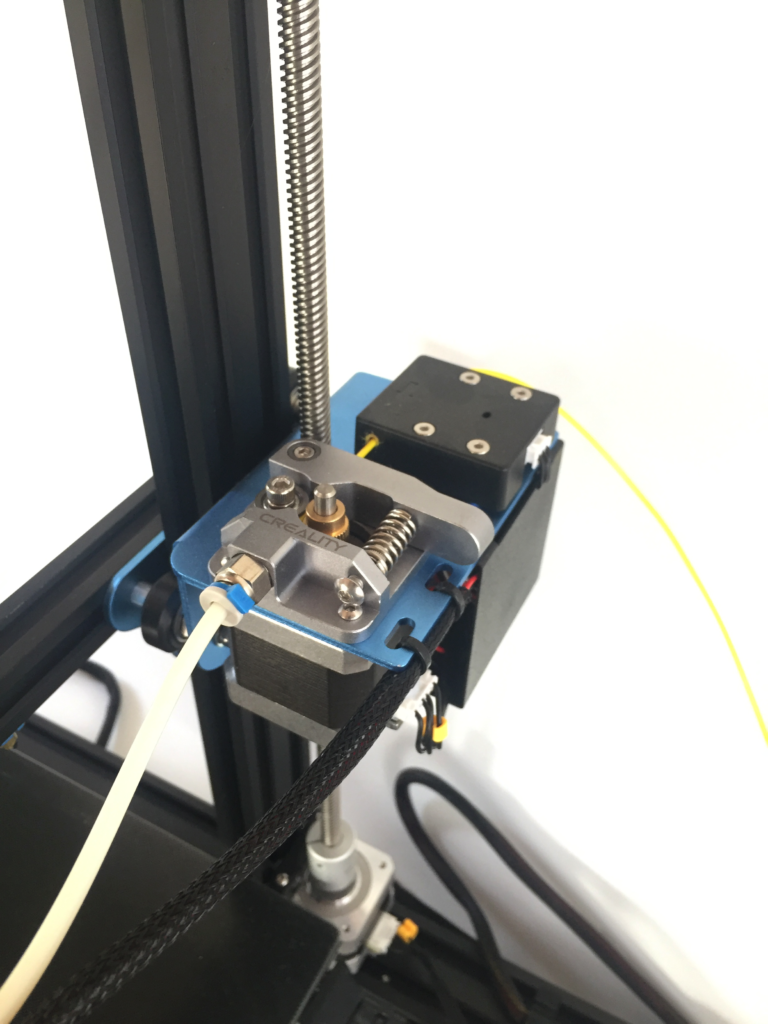
It has a dual-port hot end cooling fans. This is a refinement over some other clones and seems to improve the surface quality of prints. The printer warms up fast enough. Both the nozzle and the bed preheat quickly enough.
Bed leveling is still a semi-automated process. I did it manually with a piece of paper, but I only had to do it 2 times for a 100 hours of printing.
The resume printing function works extremely well. Several simulated stops and starts worked well and I was able to resume prints without incident. During normal operation, I ran out of filament and was able to replace it easily while print was automatically paused. I also really like doing gradients in colors so I like this feature a lot. It helped me play with gradient colors and gave me more confidence in the machne.
Specs
- Build Volume 300 X 300 X 400mm
- Weight11.5 K
- Movement speed ≤180mm/s, normal 30-60mm/s
- Positioning Accuracy ±0.1mm
- Layer thickness 0.1-0.4mm
- Heated bed temperature ≤100℃
- SD slot
- File format STL\OBJ\AMF
- Slicing software: Cura\Repetier-Host\Simplify
- OS: Mac, Linux, WindowsXP\Vista\7\8\10
- Power supply AC Input 115V/230V
- Output: 24V Power rating 350W
- Auto leveling Optional Extra
- Filaments: PLA/ABS/PETG/TPU (Would only recommend TPU with the optional Titan Direct Drive unit added).
- Filament diameter1.75mm
Overall it’s well equipped for the price and especially the build volume is comparatively good.
Results
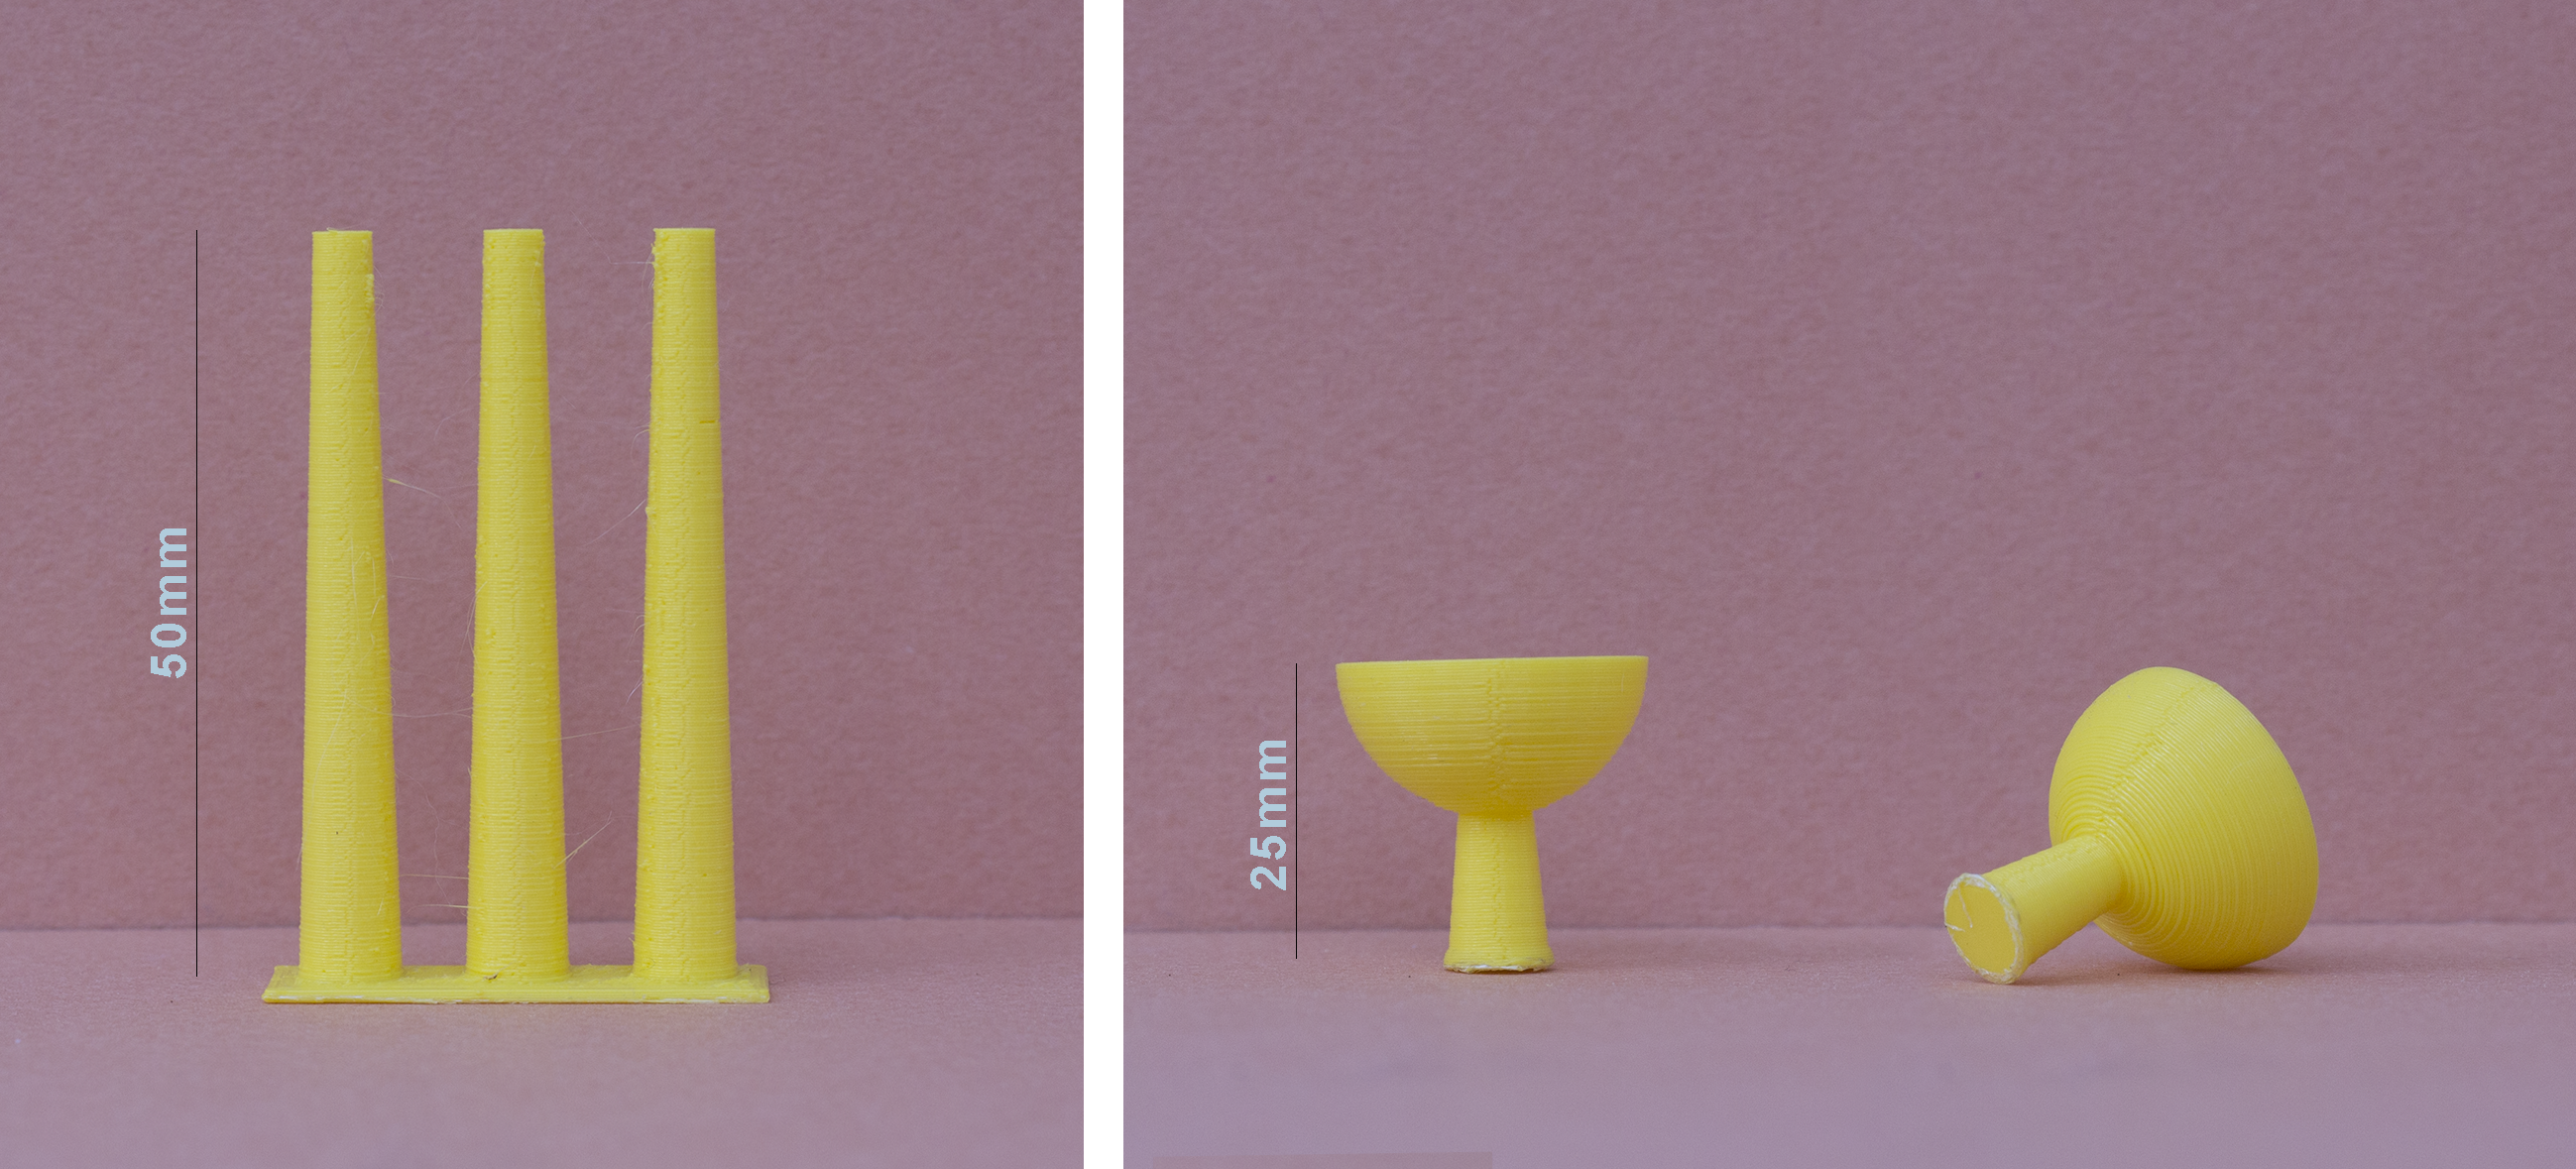
Test 1 and 2: Not bad! Some light stringing. Cura: Layer hight: 0.2 – Print speed: 60mm/s – No Supports

Test 3: This shape is not possible to get right a 100% because the tube has a 1cm diameter and is very sensitive to vibrations, but I use it as a test for the Z axis. Cura: Layer hight: 0.2 – Print speed: 60mm/s – No infill
Verdict
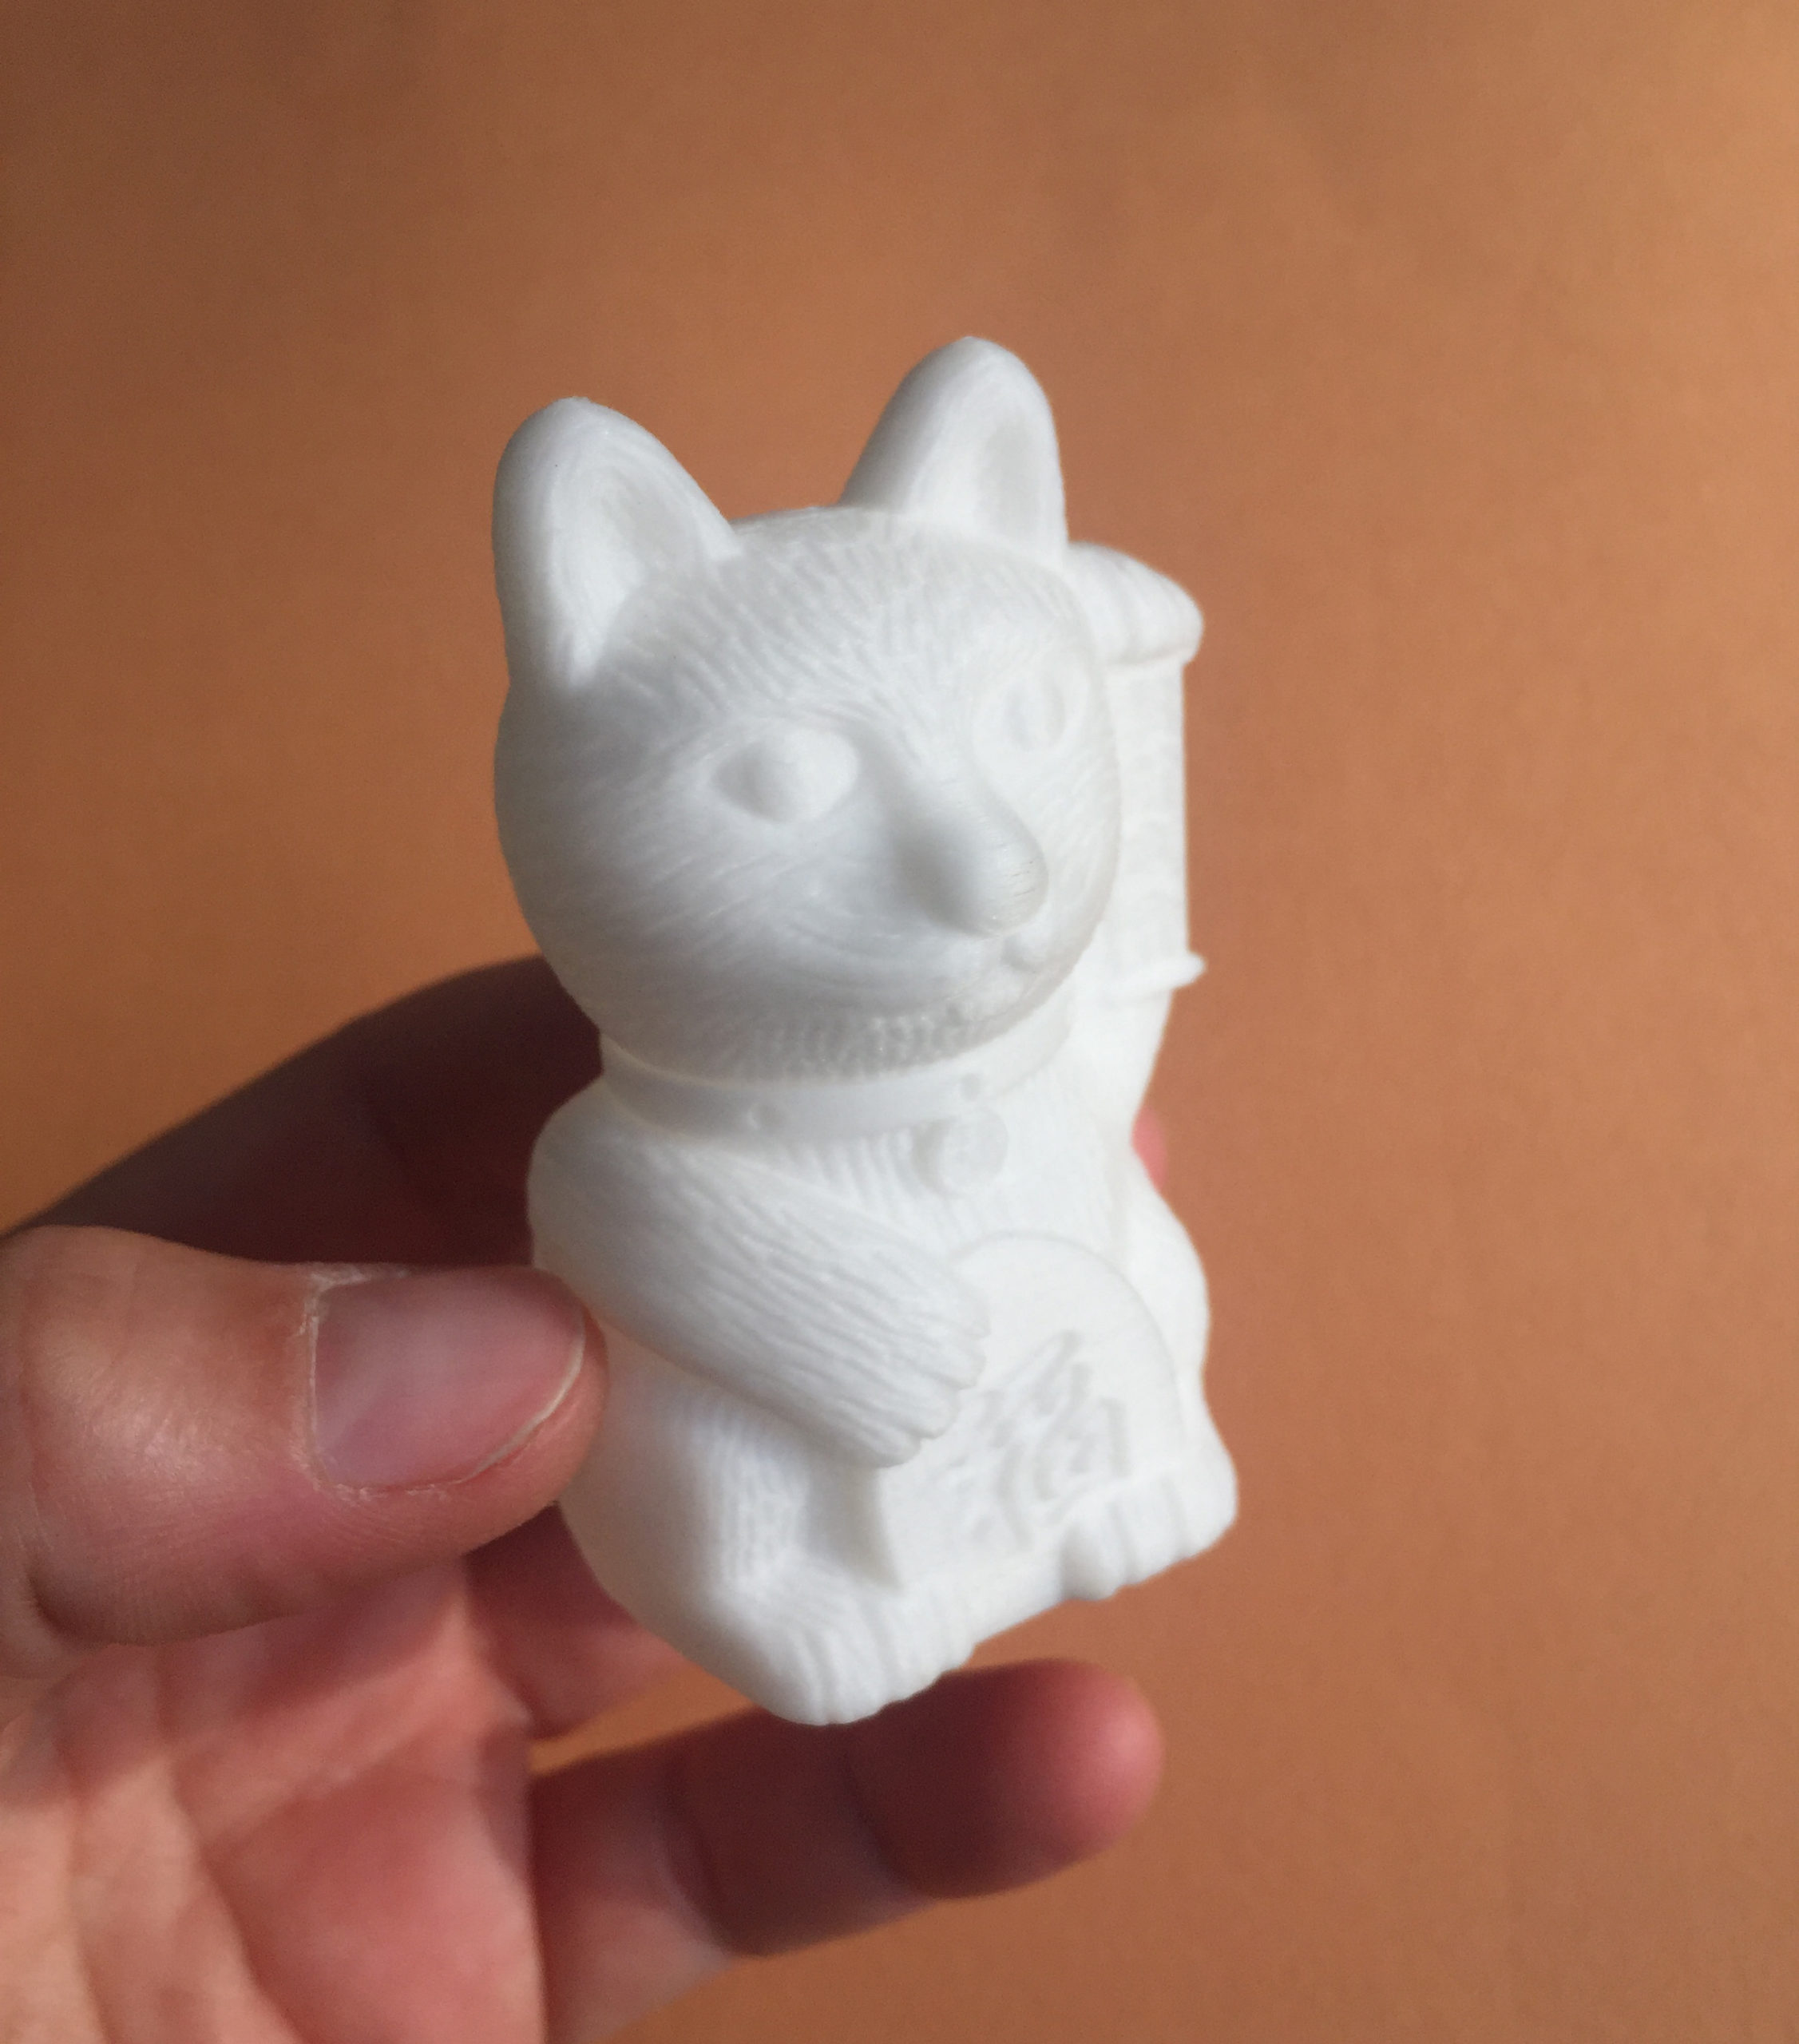
Pretty good at details. Cura: Layer hight: 0.2 – Print speed: 40mm/s – No Supports
Higher than initial Creality price points of around $200 or $300, this is still a good value machine at around $500. Build and parts quality is not stellar so I will expect to have to replace parts in the long run. Machined parts and build quality does seem superior to previous models, however. Day to day this printer is adequate for an entry-level user. Operation is not super intuitive but you will get the hang of this machine. It is easy to unbox, set up and organize. An issue that I have with it is that it is surprisingly noisy, also when compared to other similarly priced machines I have. The CR-10 V2 is a value-engineered low-cost machine with a large build volume that works surprisingly well. I was happy with the print results overall and the printer let me customize enough through settings that I could dial in new materials, new colors and optimize prints. The print detail is actually quite good. If you’re willing to take the time to understand the process and variables this could be a good first printer for you.