If you need more time to procrastinate and have fun at your desk, here’s a great new gadget idea for you: the 3D printed mini-arcade, by Instructables user diygizmo. With the easy steps involved in putting together your mini-arcade, you can really benefit from the months of development and refining of eight prototypes completed by diygizmo.
“It may look simple from the outside but a lot of engineering went into building it,” says diygizmo.
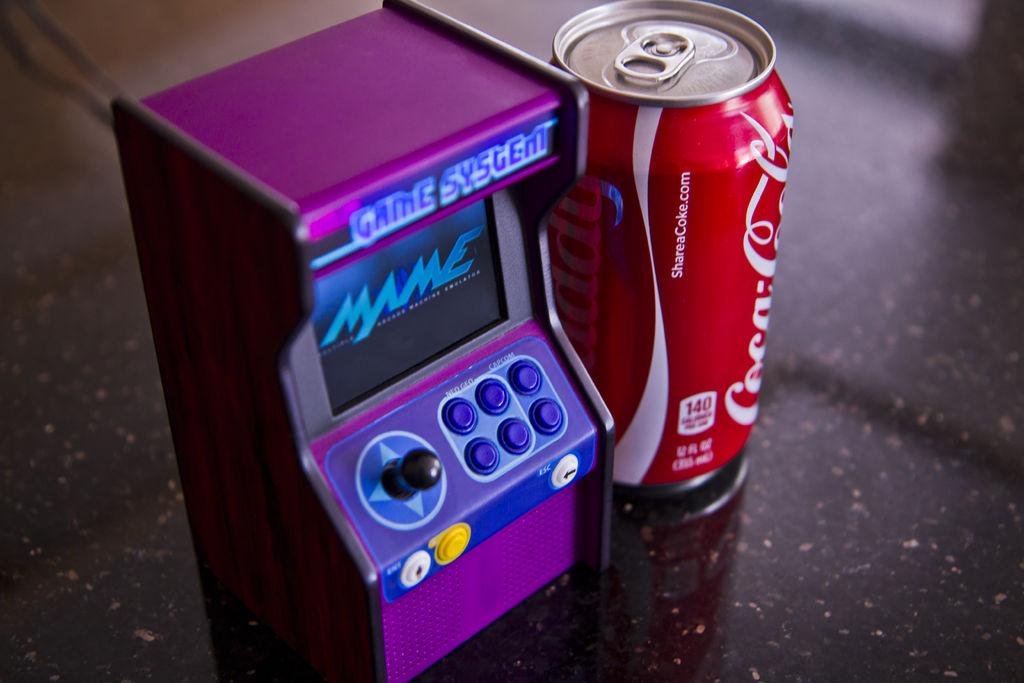
Micro in size but big in terms of fun and creativity, this is a great gadget for the 3D printing enthusiast or as a gift for your favorite gamer.
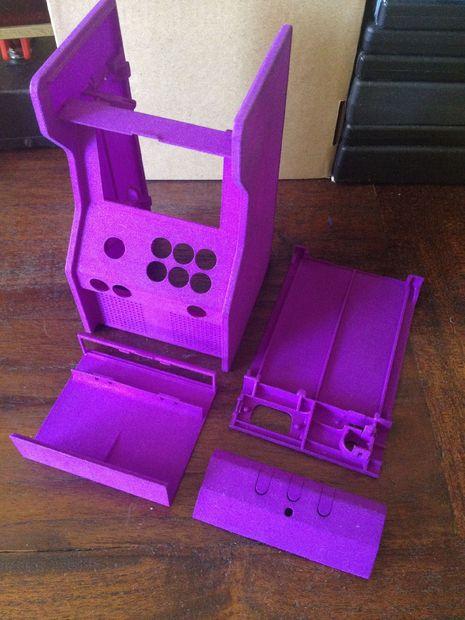
The 3D printed cabinet parts are available in a variety of colors from Shapeways, but if you are 3D printing your own, you can paint it whatever color you like — or order the white model for custom painting from Shapeways, and then all you have to do is wash it off to get rid of excess powder, and dry it with a hairdryer. To put the parts together, it is as simple as clipping on the audio amp and attaching the panel with the Raspberry Pi by pressing the six clips from the back. Attach the top panel, and then you are ready to proceed to the fun part of giving your mini arcade some character by painting it, finishing it, and adorning it with decals.
The 3D printed parts are made of nylon. Because they are constructed with such a durable material and not susceptible to alcohol or acetone, the parts can be decorated however you choose — with Sharpies or a variety of different markers, spray paint, acrylics, car paint, etc. Diygizmo recommends wet sanding the 3D printed parts before painting, and also applying a clear varnish after painting. With the appropriate sanding and painting, you have the perfect surface for printing out and applying your decals.
Discuss this latest 3D printed gadget in the Micro Raspberry Pi Arcade Cabinet forum at 3DPB.com. Check out some more photos of the production process:
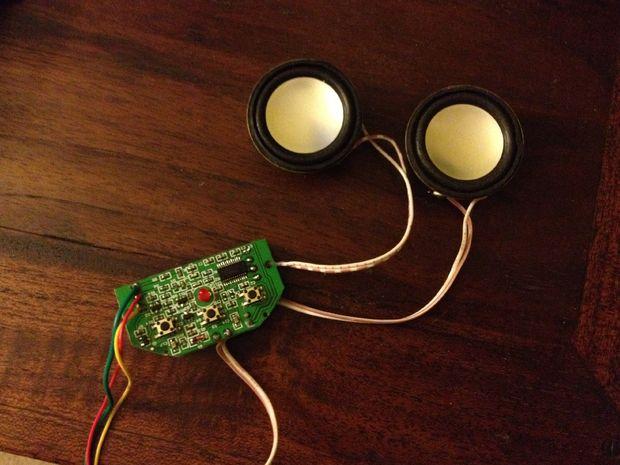
Audio board and speakers out of MP3 player
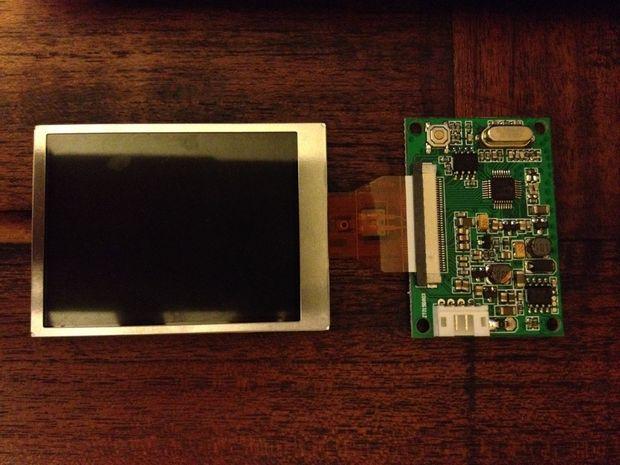
Audio board and speakers out of MP3 player
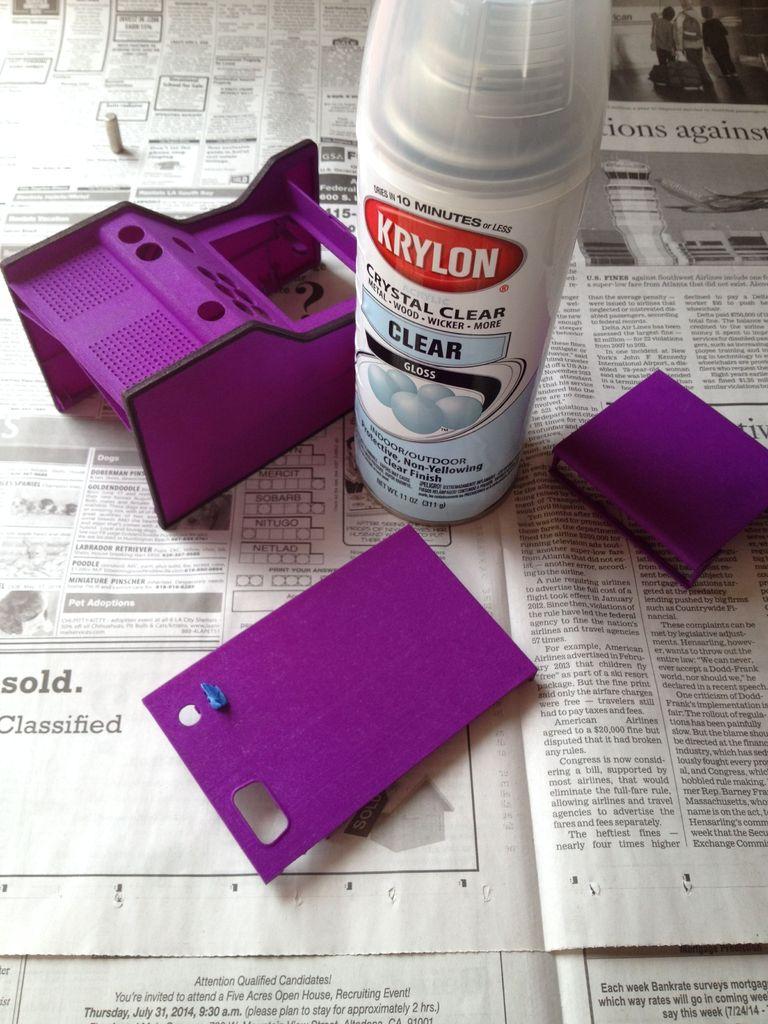
Painting and finishing
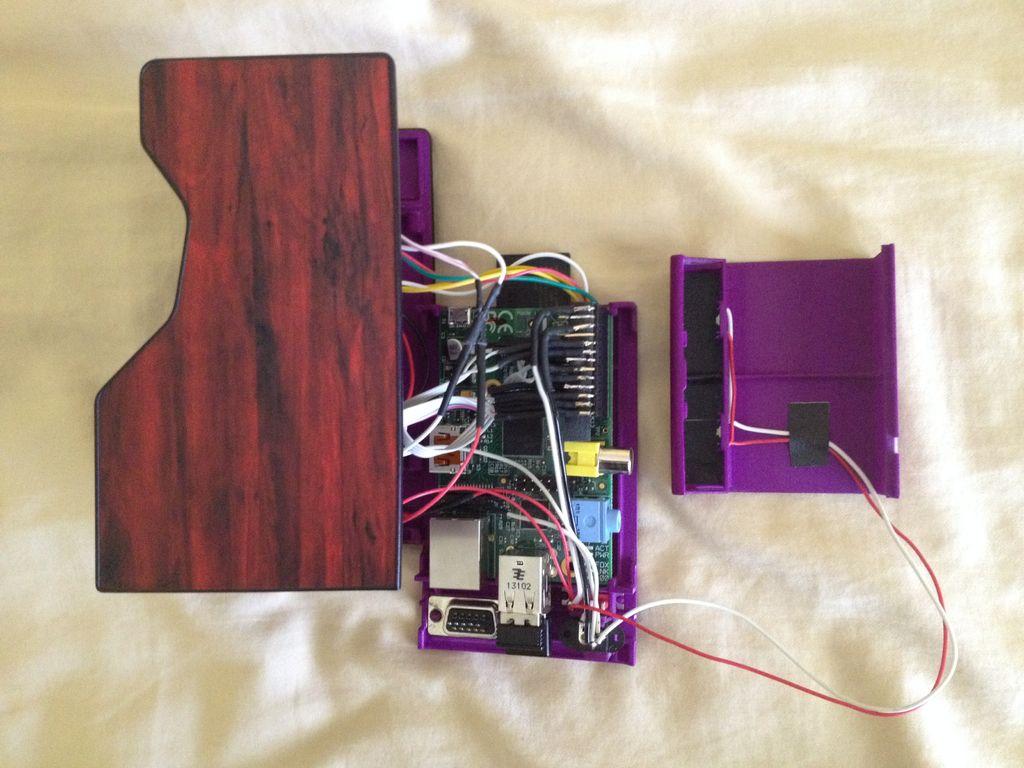
Final assembly