Form 1+ 3D Printer
It’s incredible the number of companies popping up printing items you would never imagine to be possible. On example of such a company is Netherlands-based LUXeXceL. What they are doing is incredible, 3D printing optics. Using a method called printoptical technology, they are able to create crystal clear optics which can be used in anything from prescription lenses, to LCD lighting. Their method of printing is quite unique to the industry, as they use a specially formulated photosensitive thermoplastic which is cured by UV light only after being allow to settle. This process avoids the usual lines you will find from layering.
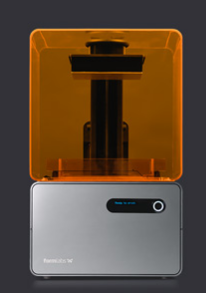
Clearly, 3D printed lenses can not possibly be created on your desktop 3D printer that you have at home, right? Wrong! Formlabs, the manufacturer of a line of SLA 3D printers, including their latest Form 1+, has managed to do just that.
An engineer at Formlabs named Craig Broady, decided to test out the capabilities of the company’s Clear resin by fabricating a magnifying monocle on the company’s Form1+ SLA 3D Printer. The Form 1+ is capable of printing with 25, 50 and 100 micron (0.001, 0.002 and 0.004 inches) layer thicknesses, making it extremely precise.
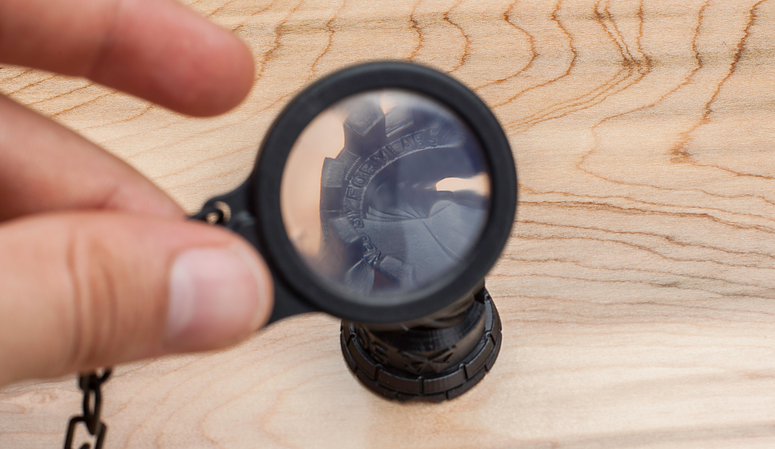
Broady went about designing the lens, as well as the black monocle frame and attached chain, in Solidworks, and then transferred it to Preform which is Formlabs’ own software, in order to prepare the parts for printing. The actual lens, which would be printed in the clear resin, measured 1.75mm at its thinnest and 4.32mm at its thickest. Broady had to be careful in designing it, so that it wouldn’t distort the object being magnified
He printed all the parts for the monocle at 50 micron layer heights, and oriented it so that it faced the front of the printer. “This allows the liquid resin to flow more freely around it during the peel cycle,” Broady stated in his blog entry. 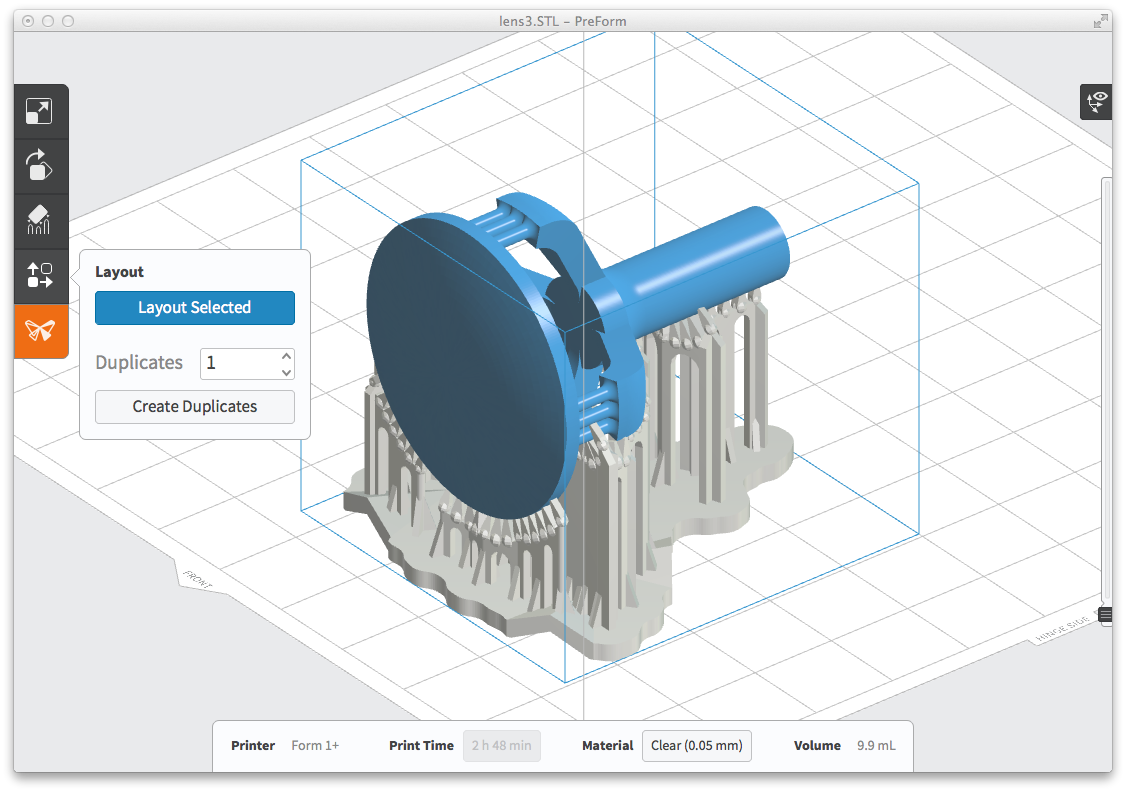
In a little under three hours, the lens and attached support material had finished printing. Immediately out of the printer, it was very smooth, however, the clarity was lacking. This is where a drill, sandpaper, cork, and Novus scratch remover came in handy. He started with the sandpaper, gradually progressing from course to fine, from 220 grit all the way up to 2,000 grit in 400 grit increments. Once satisfied, he next moved on to Novus 3 heavy scratch remover, followed by Novus 2 fine scratch remover, applied via cork, and finally Novus 1, applied via a soft cotton cloth. He then repeated these steps for the reverse side of the lens.
As you can see by the images provided, the lens came out almost crystal clear, and worked just like any magnifying glass you’d purchase at the store. The results certainly go a long way in showing off both the Form 1+ SLA printer, as well as Formlabs’ Clear resin.
Let us know your thoughts on this project, and if you have decided to do anything like it yourself, in the 3D printed magnifying glass forum thread on 3DPB.com.

