Musician and maker, Jon Stevens–also, rather notably, the VP at GrabCAD–has circumvented the guitar market by producing his own not-quite-a-Fender-Stratocaster Guitar, with a 3D printer. A good quality American Fender Stratocaster 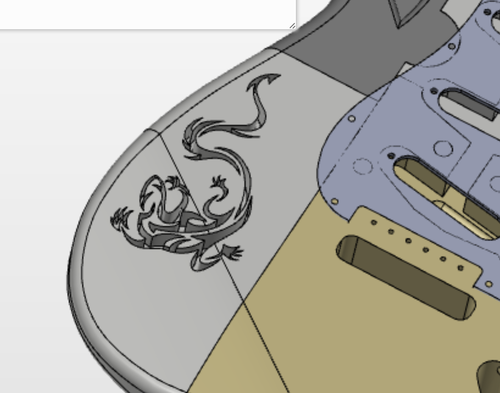
“I’ve decided to 3D print my own guitar,” wrote Stevens, and “to use the Makerbot Replicator 2 machine to print [it].” The Makerbot Replicator 2 retails for around $2,900. Stevens noted that the 3D printer, although efficient and “relatively affordable,” did not have a print bed large enough to produce the entire body of his guitar. Therefore, he opted to print the body in six separate pieces and connect them himself.
Perhaps not surprisingly, the VP of GrabCAD, began designing his guitar using a CAD model from none other than, you guessed it, GrabCAD.com, which he maintained–acknowledging the blatant plug–was “still the best and only library for bespoke CAD models of mechanical parts, cars, engines, musical instruments and just about everything else you use in your life.” Stevens chose a “1962 Fender Stratocaster” model, although he modified the shape in keeping with his own tastes and to facilitate the 3D printing process.
The 3D printed snapfit electric guitar
Stevens described his thought process: “…There are three things I want to consider when making my guitar model: the hardware and electronics, the aesthetic design and the manufacturing process/materials.” He found the neck, the pick guard, and the electronics and hardware on Amazon.com for less $90.00. He was a bit disappointed when the neck he ordered arrived and had one less fret than a Stratocaster, so he picked up a new one made by Mighty Mite from the Guitar Center.
With the various parts assembled, Stevens began preparing his CAD file for 3D printing. The first step in that process was to ensure that “everything fit together” and to determine how many pieces he would need to print. To answer that question, he created a 2D image of his guitar, which he printed to scale. He connected the 2D-printed components, a step that he felt “would be quicker for rough measurements [rather] than performing many measurements in a CAD system.”
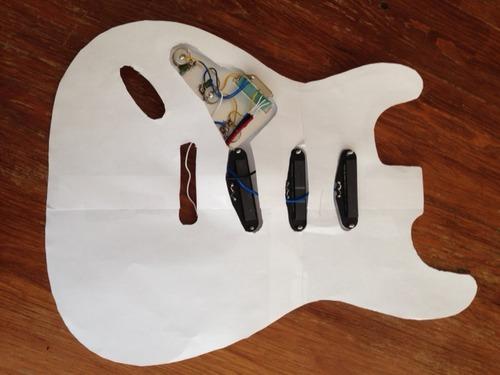
2D Test Print
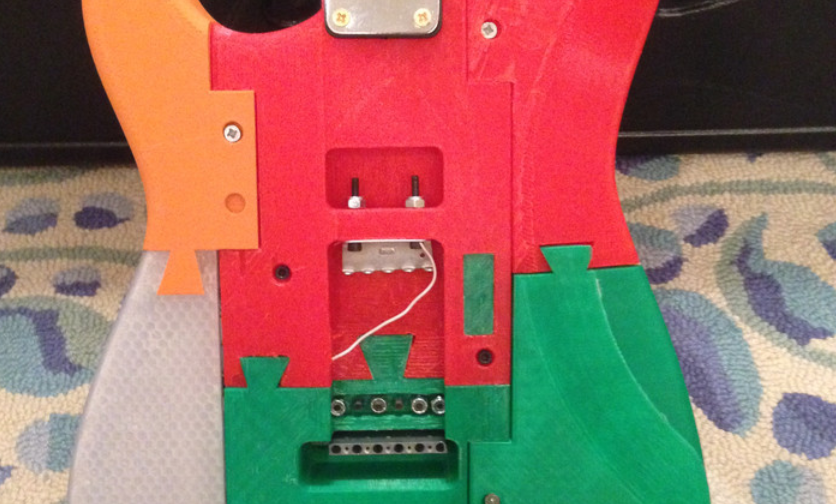
With that step completed, he was able to note where modifications would be required and decided to print the guitar in six separate pieces. Stevens used Fusion, a 3D CAD system from Autodesk, as well as GrabCAD Workbench, making certain modifications, with the most important being to strengthen the center of the guitar.
Aesthetics were important, too, and Stevens decided to decorate his Stratocaster with an image of a stylized lizard, which he got from the GrabCAD library. He explained, “I then used Autodesk Fusion to subtract this solid body from my guitar and that gave me a cool lizard cutout on my guitar.” He also decided to use different colors for various parts of the guitar, including orange, a color he already had on hand. Of the multi-colored look, Stevens mused, “It may look cool or it may look like the Partridge Family bus.”
Before printing, Stevens modeled “joints and through-holes for bolts” to connect the various pieces. He then test-printed a few of the pieces to confirm that the joints functioned properly and made a test print of the parts of the body where it meets the neck to ensure the final printed pieces would fit together well. After resolving
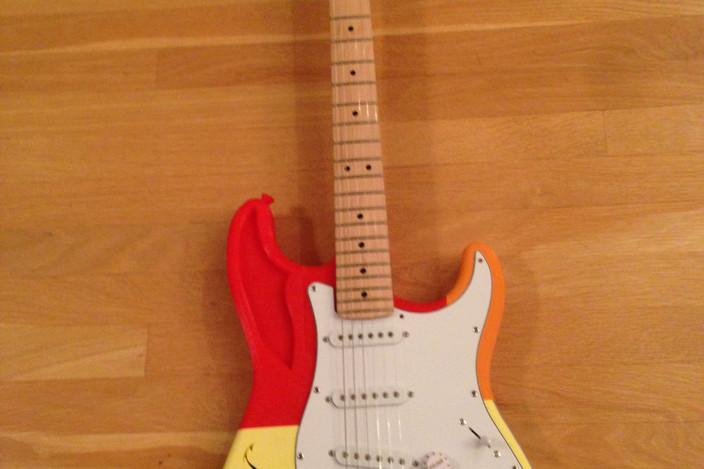
On the ready availability of resources for manufacturing and design data, Stevens also paid homage to “the beauty of the cloud,” which he explained makes “data and files available anywhere, anytime, on any device.” He went on to say, “We take this for granted when it comes to things like photos and email, but it’s also now true for design and manufacturing data.” Stevens shared a video of the end result, including playing a short riff on his new Stratocaster–almost but not quite music in 3D!
Did you think it was possible to 3D print an entire electric guitar on a MakerBot Replicator? Let’s hear your thoughts on this incredible design in the 3D printed snapfit guitar forum thread on 3DPB.com.