![]()
List of Items You’ll Need:
- Your 3Doodler Start
- Start Eco-plastic in: Tangerine Tang, Simply White, Koala Grey, Lemon Zest, and Ghostly Glow
- LED tea light
- Drinking straw, and a stick that will fit inside the straw
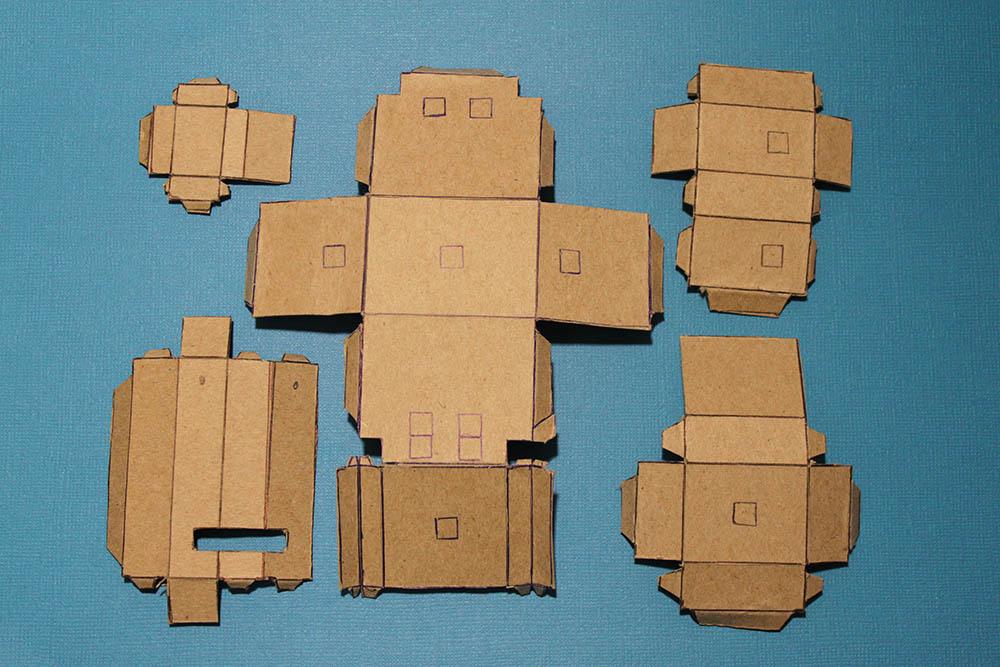
- Sheet of stiff paper board, such as that from a cereal box
- Glue stick
- Paper
Next, take the drinking straw and divide it into six pieces, each measuring half an inch.
“Tape the straw to a flat surface, and then extrude your Eco-plastic into the straw. Use your stick to push the plastic down in the straw to create a more solid cylinder. Keep going until the straw is full,” instructs the 3Doodler team. “When the plastic has hardened, push or cut the plastic out of the straw. Repeat to create six pegs.”
You’ll then want to wrap just a small piece of packing tape around each peg, keeping in mind that you don’t want to overlap the tape. Then, begin Doodling Eco-plastic around each peg that you’ve taped.
“Once the plastic is hardened, push the center out,” states the 3Doodler team. “Take the tape off the pegs and put them to the side. Use the paper board models you made for the arms, legs, and body, and Doodle over the surface of each piece following the color pattern.”
“Start by tracing out the stencil for the head pieces on your paper board and cutting them out,” says 3Doodler. “Then arrange the pieces for the four sides of the pumpkin head on your paper, taping over each layer.”
Doodle over the patterns, and then when the Eco-plastic has hardened, you can peel of the pieces.
“Push down with your hands as you go to flatten the Eco-plastic. Use Ghostly Glow for the eyes and mouth so your pumpkin’s face will glow in the dark!” recommends 3Doodler.
Next, ‘flesh things out’ using the pegs. Cut the paper into smaller pieces, with holes for the pegs. One peg goes through the bottom of the pumpkin head. Once you see that it is straight, move on to attaching the outer peg sleeve to the head. According to the 3Doodler team, at that point you’ll want to put the peg through a piece of paper and into the top of the body.

“Hold it tight and attach the peg to the body from the inside. Once the plastic hardens, you can pull the head and body apart. Repeat this process for the rest of the body, arms, legs, and hips.”
You won’t want to attach the head yet, but it is time for assembly otherwise, allowing the 3Doodler to act as the glue for connecting the corners of each of the pieces.
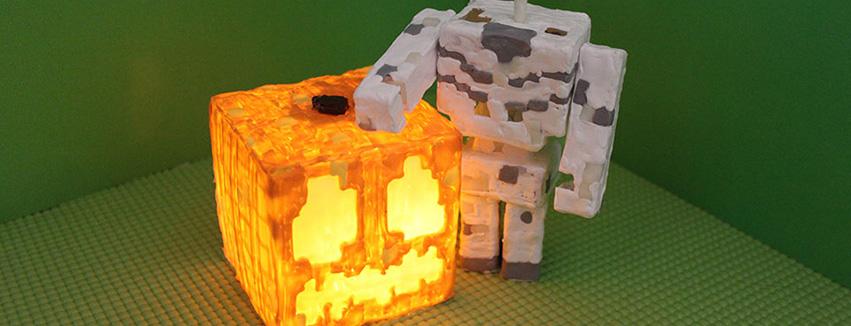
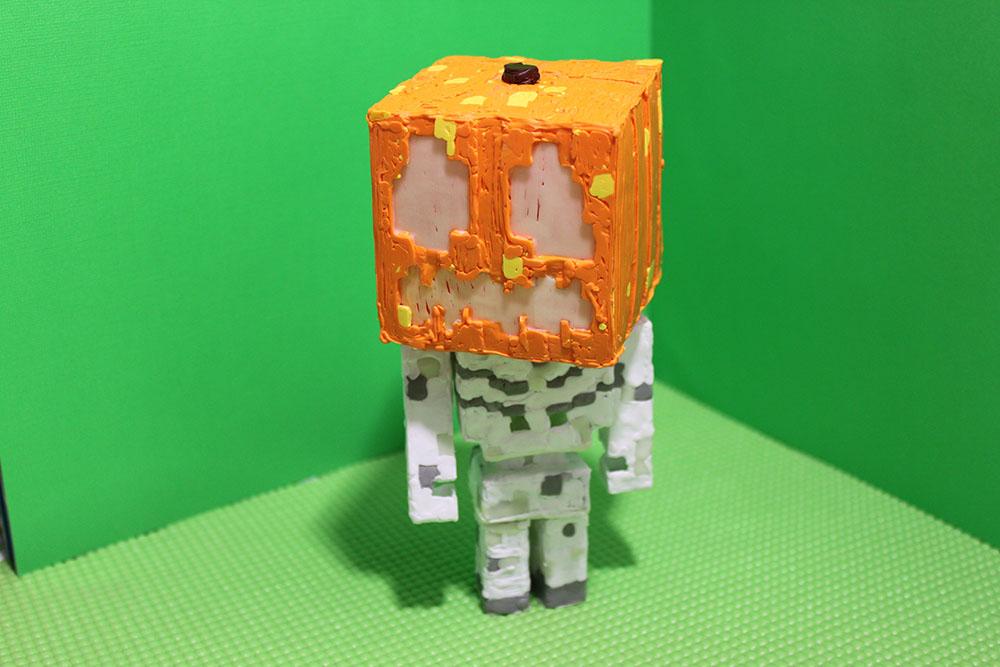
See instructions for setting up the tea light to make your jack-o-lantern glow, and then make the stem for the pumpkin head. You can then attach the pumpkin’s head once everything has hardened. One that’s complete, assemble the Minecraft Jack-o-lantern Skeleton and light up your new project, enjoying this each year! 3Doodler invites you to show off your Minecraft Jack-o-lantern Skeletons, and be sure to tag them with #3Doodler and #WhatWillYouCreate. Discuss in the 3Doodler Minecraft forum at 3DPB.com.
[Source / Images: 3Doodler]