![]()
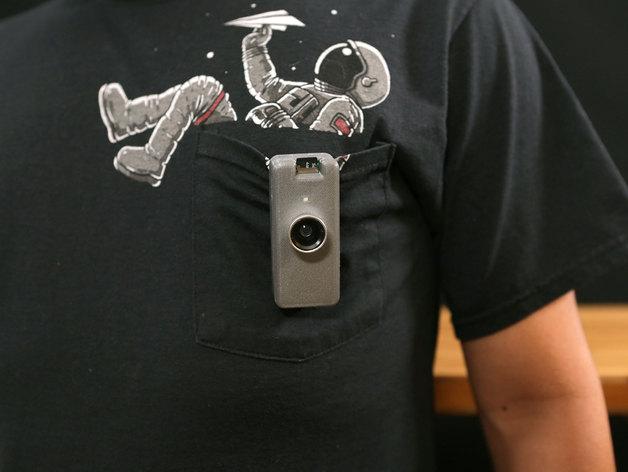
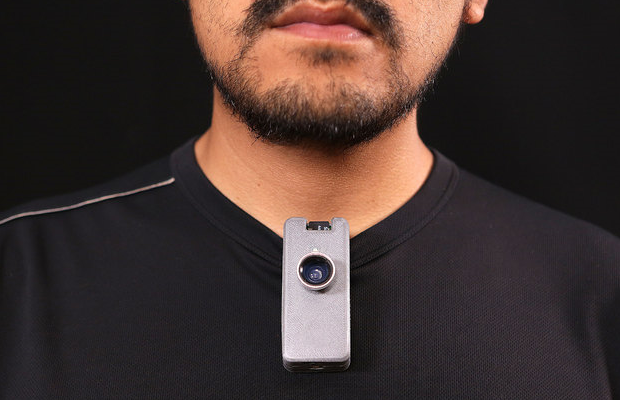
But if you are interested in going the easier route with an easier style that doesn’t require a mount, check out the latest from Adafruit. Here, with little expense you can make yourself a small wearable device that fits snugly into a 3D printed case. It then clips on to your clothing or pack, a lanyard—or can even be set on a tripod—and is a great project for anyone interested in time-lapse photography or just making a log of daily activities.
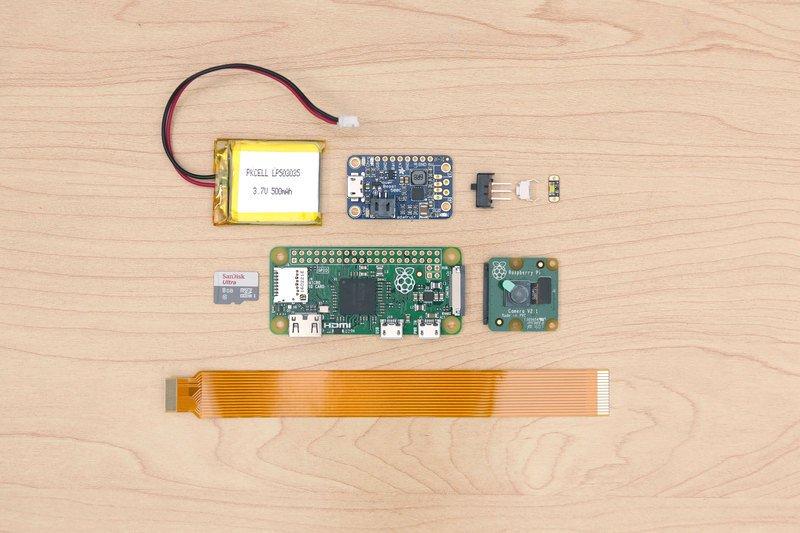
Here is the list of basic items needed for the project, as laid out on Adafruit:
- Raspberry Pi Model Zero version 1.3 (with camera connector)
- Raspberry Pi Camera (any version — 8 megapixel v2 or original 5 MP — even infrared if you like)
- Raspberry Pi Zero 1.3 Camera Cable
- 4GB or larger micro SD card
- PowerBoost 500 Charger (not the PowerBoost 500 Basic; must be the 500C!)
- 500 mAh Lithium-Ion Polymer Battery
- 6mm Slim Tactile Pushbutton
- Breadboard-Friendly SPDT Slide Switch
- LED sequin, any color
- Soldering iron, wire and related paraphernalia
- 3D printer and filament
- Craft glue such as E6000 or super glue
“You may need some additional parts depending on the installation procedure used–perhaps a USB flash card reader, or a second Raspberry Pi during setup, etc.,” states the Adafruit team. “Read through the whole guide and check your parts stash before making any purchasing decisions.”
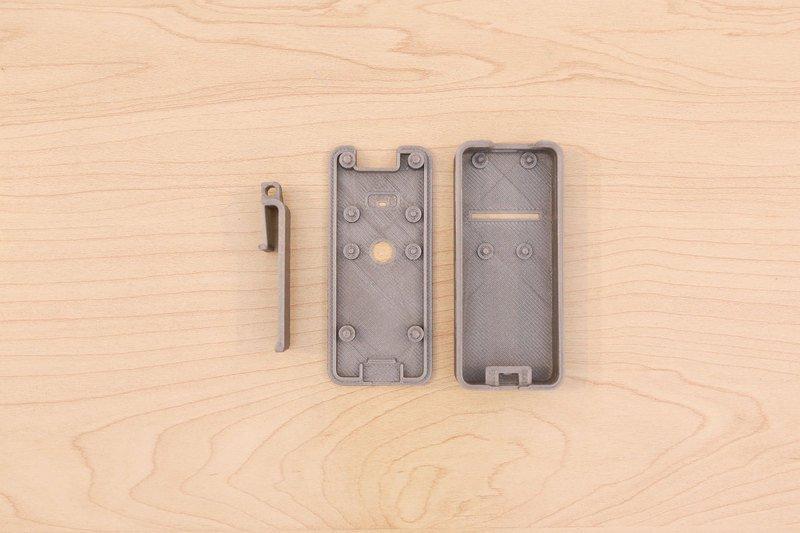
It’s best to start with the 3D printing portion first, and you can find the design files on Thingiverse, YouMagine, or Fusion 360. You should be able to make this on the smallest of printers, using 20% infill, and no supports. PLA is recommended, but if you are using ABS, the Adafruit team suggests trying an increase in scale of about 2%. To hold the separate parts together, all you will need is a bit of craft or super glue.

See the Adafruit tutorial for step-by-step instructions on wiring and connecting the LED, button, and PowerBoost. Once that is complete, just a few more simple connections are required:
- PowerBoost 500C output connects to 5V and GND.
- LED sequin + connects to GPIO5, – to GND.
- Halt button connects to GPIO21 and GND.
“If required, the LED and button pins can be changed; this is explained on the “Using It” page,” states the Adafruit team. “Maybe you find it easier to route the wires to a different spot, or are building a camera with custom features.”
- The 6mm slim button
- PowerBoost 500C
- 500mAh lip battery
- LED Sequin
- Pi camera
- Raspberry Pi
- Slide switch
Using your new camera is as easy or as complex as you want to make the process, depending on your knowledge level and requirements. You already have the software ready to go, and it works completely on its own. With everything programmed, wired, and assembled, it’s time to power on, boot up—and you are ready to start taking pictures!

You can then remove the SD card and begin working with the images on your computer if you so wish, finding them in the ‘timelapse’ folder as explained earlier. All of your images will be in sequential order. If you have further questions, want to change the settings, or troubleshoot further, see the Adafruit tutorial here. There you can also find ways to extend the run time of the camera, expand SD card limitations, merge stills into videos and .gifs, and more. Is this a project you might make? Let’s talk about it over in the Wearable Camera with 3D Printed Case Forum at 3DPB.com.
