

So how do you use Photoshop to create 3D models? In the tutorial, you’ll learn how to edit using different views, how to edit in the space and in the UV skin, and how to print 3D models. Using a model of a “piguin” (pig and penguin combination) you’ll learn to import common 3D formats like PLY, OBJ, IGS, and STL — of course. If you don’t have a 3D file, there are plenty of model databases here that can help you find one.
After you have learned about import files, it will be time to learn about the basic controls like manipulating and rotating the view, zooming in and out, and switching between views of your model that have been pre-identified (like the main and secondary views.)
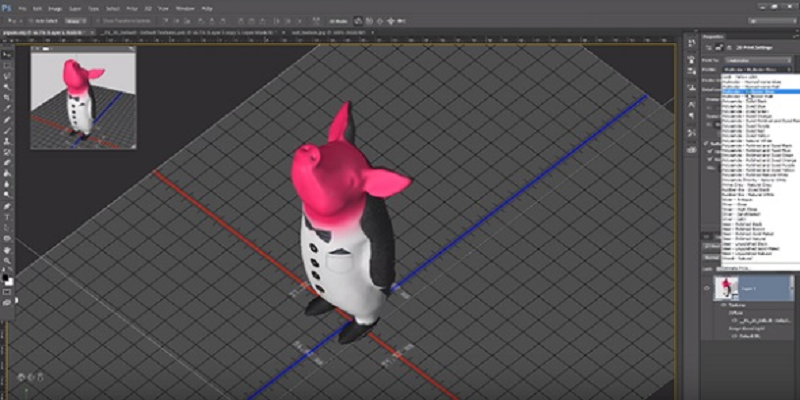
Step 3 of the tutorial has you learning to use Photoshop to investigate the 3D model. You can change layer characteristics of your model, which is explained here:
“With the segmented view for instance, you can virtually cut your model open on the X, Y, and Z axis to take a look inside your model. You can also display the design as a point cloud wireframe structure and switch other effects such as shadows off or on.”
Are you beginning to get the impression that Photoshop has really gone all out here to include many complex functions as you design your 3D model?

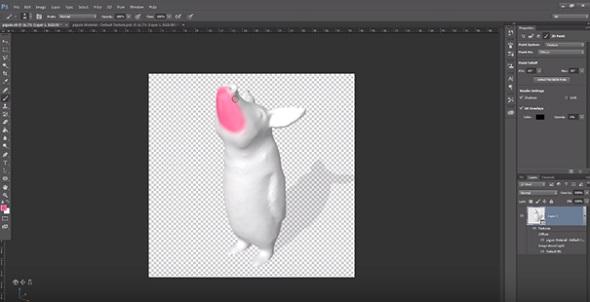
You can also switch your model from 3D to 2D to paint its skin (Step 5):
“This means that the UV skin of the model will be unwrapped and easy to edit. You can change the UV overlay capacity, select the brush size and hardness of your choice, and use any of the Photoshop editing tools you have in mind. For example, you can add effects and filters such as noise, distortion, pixelation and many more.”
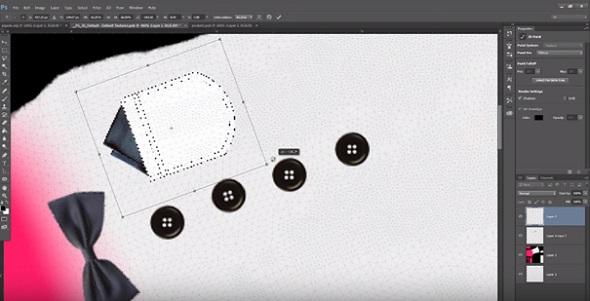
Next, in Step 6, you learn to import files and images into your 3D model. These images, after imported, can be modified by the Photoshop editing tool of your choice. This includes the ability to work with texturing and layering once you’ve imported them in the 2D view and then navigated the images to the correct place.
The final step is an easy one: when your model is ready to be 3D printed, you simply hit the “print” button, select i.materialise as your printing service, and then choose your color and finish. You can preview the model by clicking “prepare to print,” and once that has happened and you feel good about printing your model — you are ready to go!
I don’t know about you, but after hearing all of this, I can’t wait to try Photoshop CC! What do you think? Tell us over in the Photoshop & 3D Printing forum at 3DPB.com.