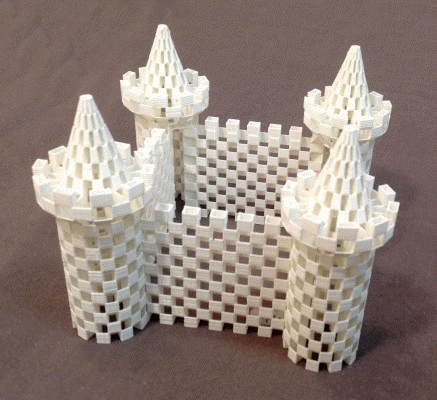
“Over the last two months I have developed an interesting new 3D printing technique for FDM/FFF printers,” Es told 3DPrint.com. “I call it ‘Es-Cage printing‘.”
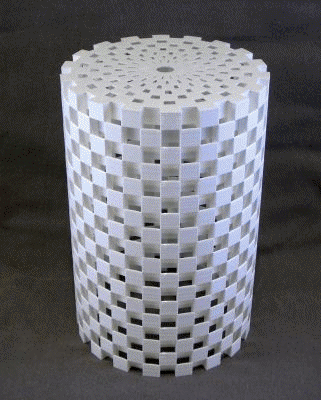
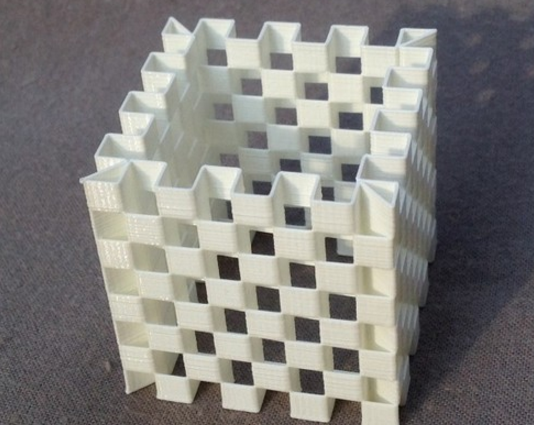
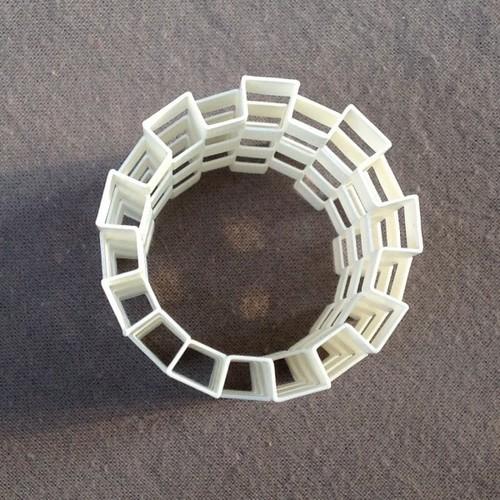
Models, like that of the basic cylinder, are composed of numerous stages, bearing indentations, and each one containing and inner and outer shell which is connected by radials—part of the construction which must match up exactly, as they, according to Es, form the beams, which in a design like a basket are used to bind the stages together.
“The trick of Es-Cage printing is that each stage is modeled so that the next stage will have exactly the same radials, but “switched” inner and outer shells,” explains Es. “Basically, the printer is printing ‘zig-zags’ all the time, alternating between zig-zagging and zag-zigging to form the stages.”
Radials can also offer ‘body,’ and result in something like a wicker pattern. See more regarding that topic in his section for baskets.
“The prints come out clean, and print time is relatively low compared to normal printing,” says Es. “The amount of radials can of course vary, as can the height of the stages and the thickness of the resulting ‘wall.’

Although offering a rather delicate appearance, the lightweight cage designs are as strong as they are lovely–and require only one continuous print. Es states that even with his tiny prints, they are so strong he can stand on them without seeing them break or even bend.
In experimenting, he began to work on and perfect 3D printing squares, spheres, cylinders, and even shapes that are combined, which in the end allowed him to perfect a desk organizer. While he was able to merge items like the cube and the cylinder fairly easily, he was challenged in combining the cube and sphere shapes, in terms of how they intersected.
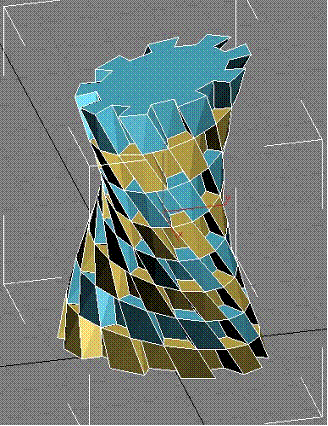
“Once a model is finished, it is quite easy to deform it,” says Es. “In the pictures you can see the first example of applying a ‘twist’ operation to the model.”
Even more complex shapes resulted in lamp shades, as the designer cut out separate tops for each one, shaping them to match each pattern. He then printed them using a spiralized technique—and if you want to figure out how to do that yourself too, you will have to wait for Es’ next tutorial—soon to be released.
Erik Es’ tutorials are very thorough, and chock full of great images to help you understand what you are doing.
For the other designs though, he has released two tutorials which offers the basics on how to make your own 3D printed Es-Cages. He explains how to print in the two main ‘flavors,’ regular and Only Follow Mesh Surface (with no bottom option).
In the tutorials, you learn how to:
- Create a cylinder using the OFMS setting in Cura – this is the easiest method and allows the center of the nozzle to exactly follow the surface of the model. There are limitations for this process however, because you can’t have a bottom/top, skirt/brim, and there are no retractions.
- Create a cylinder using the regular setting – while this is slightly more difficult, your model can be printed with a bottom—but it must be at 100% scale.
The instructions are extremely thorough, and you should have a lot of fun creating your own cages, with numerous other tutorials on the way, promises Es.
“I have found that this technique opens up a whole new world of possibilities, of which I feel I have only scratched the surface…” Es told 3DPrint.com. “I’m sure there must be many other useful, fun applications for this technique besides the ones I have found so far.”
If you are a fan of Es-Cage printing, be sure to check out some of Erik Es’ other creations, from desk organizers to jewelry, in his webshop. What do you think of these new designs? Tell us in the 3D Printed Es-Cage forum over at 3DPB.com.