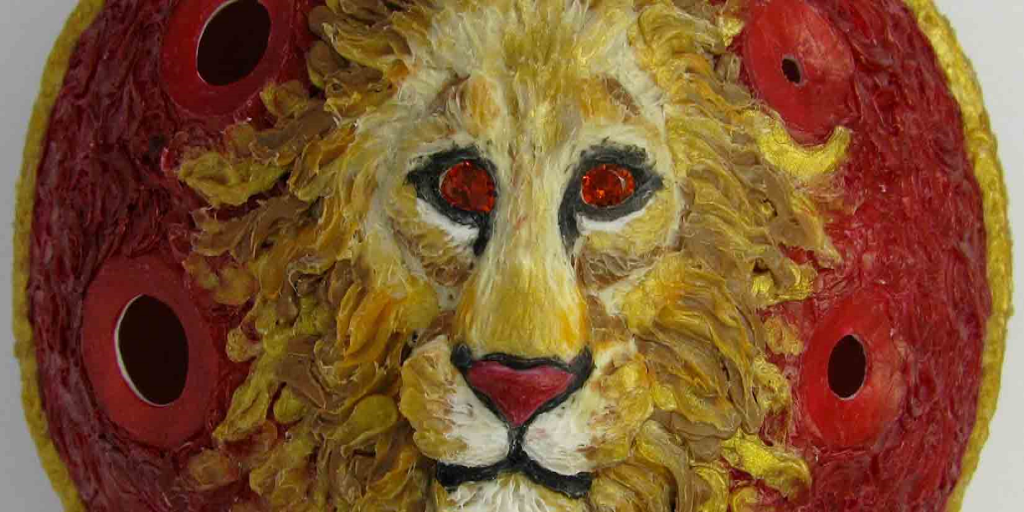

In Step 1, you need to pick an object that you will doodle over so you can make the front of the pendant. If an ocarina has a small interior it will have a higher pitch, so you can choose how large or small your want the interior of your ocarina to be, controlling the pitch. A curved dome shape proves ideal for pitch, and so, if you can, choose a small or medium metal gravy ladle as your object here. Then you cover the form with painter’s tape, which the doodled plastic sticks to, and mark where the holes will be, darkening them with a marker. Holes should be far away from the voicing.

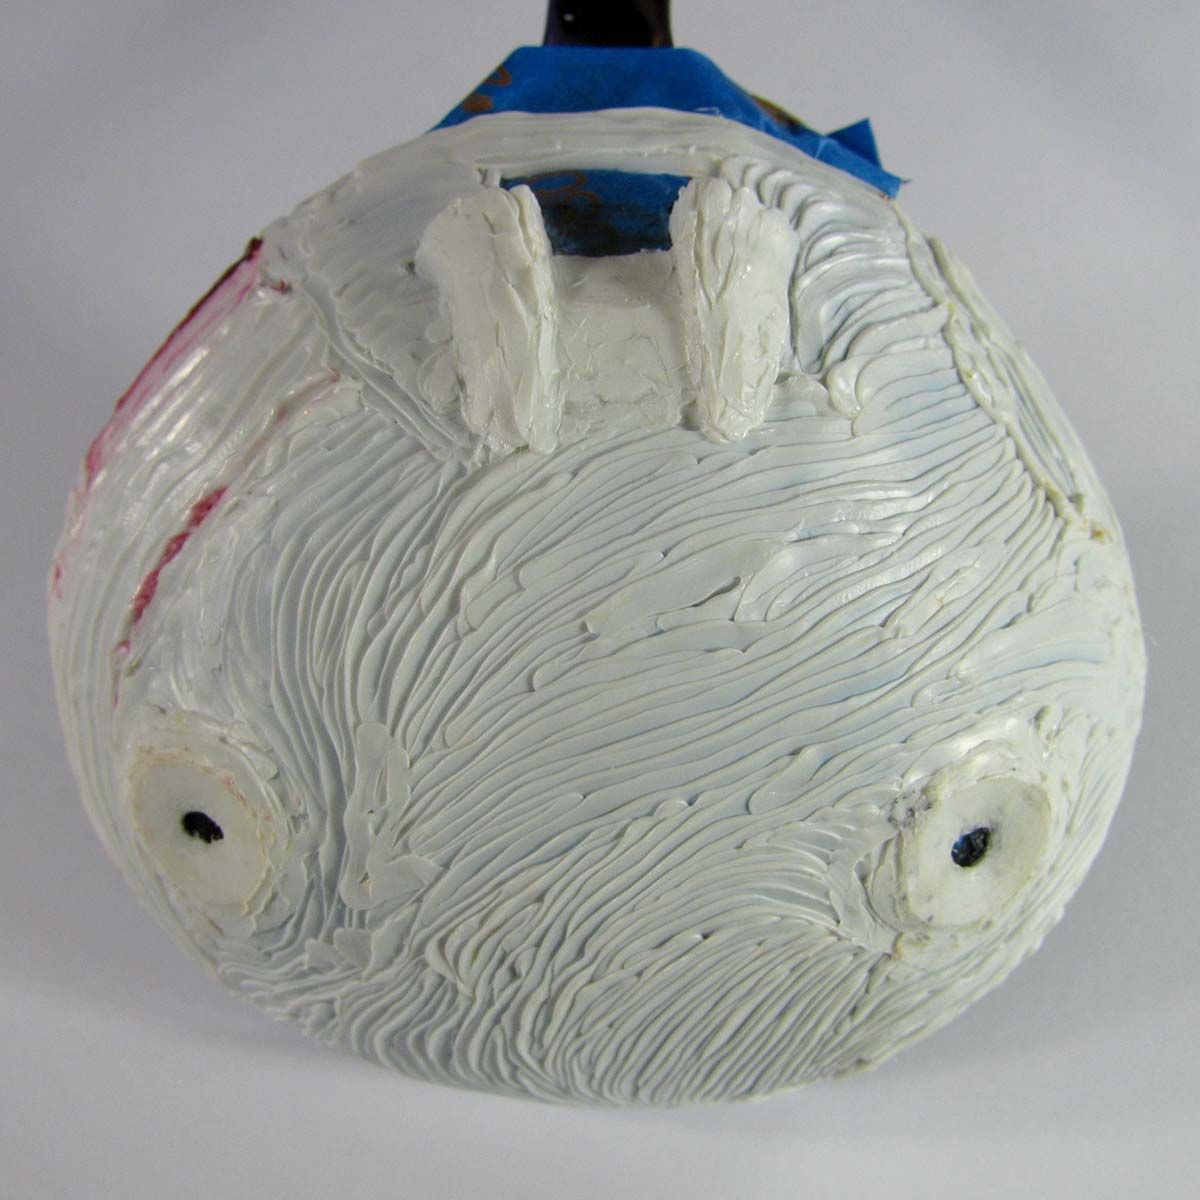
Next, you make the ocarina’s skeleton with ABS plastic strands using the largest nozzle in your 3Doodler set. Michael describes how to make the holes:
“Make sure that each layer of plastic touches completely and leaves no holes for air to escape. Add extra plastic around the sound holes and use the edges of the nozzle to smooth around them to make a comfortable place for fingers to touch. Making the holes too small is better than too large at this point, because they can always be carved larger when tuning.”
In Step 2, you make the pendant clasp by taping over a round form. Michael used a jump ring mandrel, or you can use a pen or other round form. Draw your clasp shape and doodle over it, setting it aside for later. Steps 3 and 4 provide detailed directions for the airway stick and mouthpiece, and then in Step 5 you find yourself doodling the back of the ocarina. Add a tape layer to the same form you used for the front; if you are making a 6-hole ocarina, you draw 2 holes (a 4-hole ocarina doesn’t need extra holes).
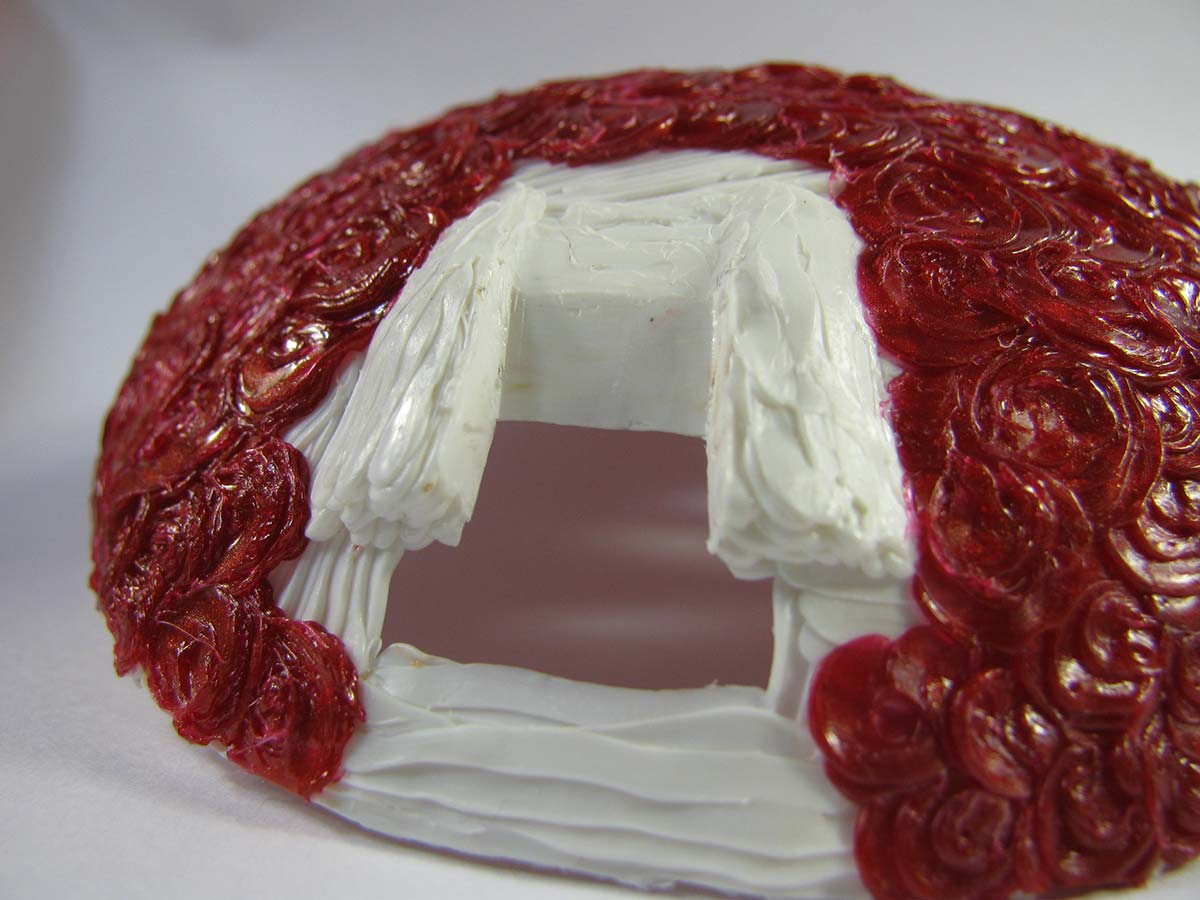
Last but not least, since this is a musical instrument, it needs to be tuned. You can do this by following Michael’s detailed instructions in Step 8, which refer you back to Step 5A’s focus on Voicing.
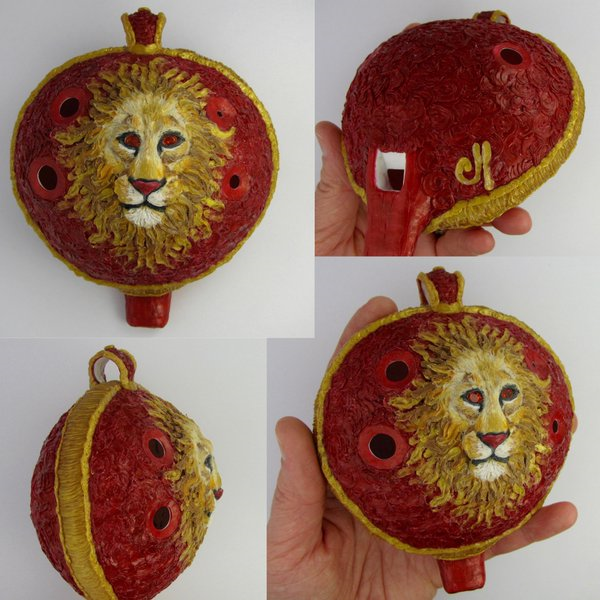
After all of those steps, you won’t be sorry. The next thing you know you are skipping merrily through a field playing your 3Doodled Lion Pendant Ocarina without a care in the world!
You can also skip these steps and go right to Michael’s Etsy shop, where she sells this and other (including custom!) ocarinas, pendants, and more — this design goes for $250. Tell us your thoughts on this design in the 3Doodled Lion Pendant Ocarina forum over at 3DPB.com.