You have heard it many times: a green thumb exists allowing people to take better care of their plants. What if you like plants, but have a track record of letting them die? Is there anything that can be done? Proper sunlight is one main issue behind healthy plants. And another major tip for keeping them healthy is watering them. Some people get so busy in their daily lives that even watering plants seems like a chore. For those people, who are familiar with 3D printing, there’s a new solution. This Instructable for a Self-Watering Planter can take care of your plants watering needs, while also serving as a modernist decorative item for your home or office!
Before I go any further, I need to acknowledge that this planter was created by one of Instructables’ great designers, JON-A-TRON or Jonathan Odom. The last contribution of his covered here, the 6 Flask Coffee Cold Brewer, is an amazing device allowing for the cold brewing of 6 different kinds of coffee at one time. The Self-Watering Planter retains this design spirit that combines useful household and everyday items with exciting designs. If you live in JON-A-TRON’s world, you can awake to cold brewed coffee with your plants already watered. Sounds good to me.
The planter design, which was done in Fusion 360, emerges from the best way to water plants, as JON-A-TRON explains:
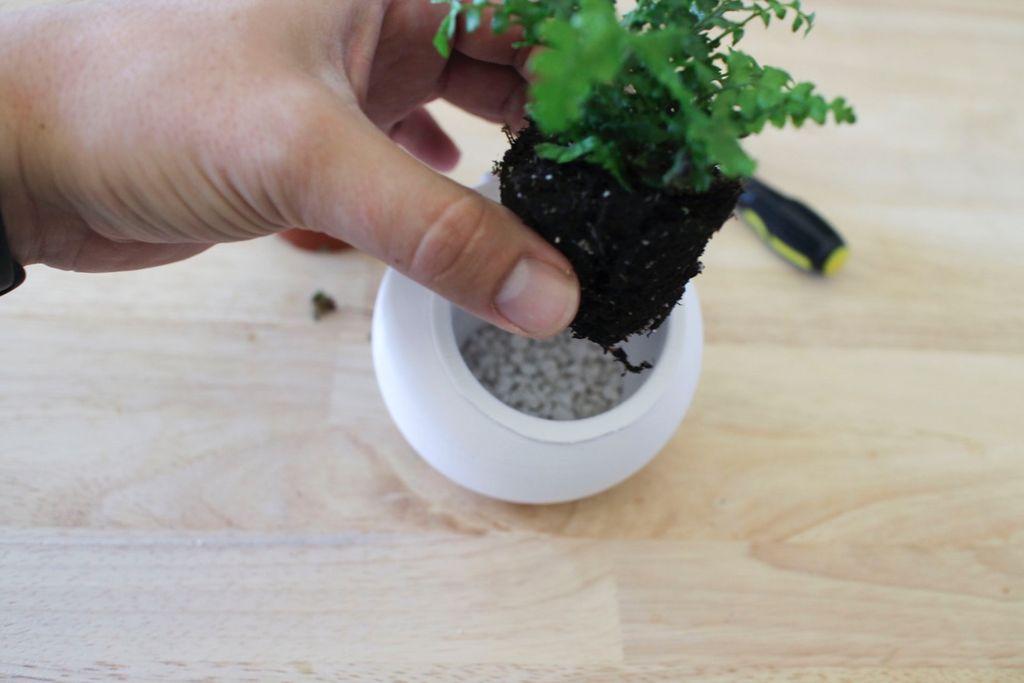
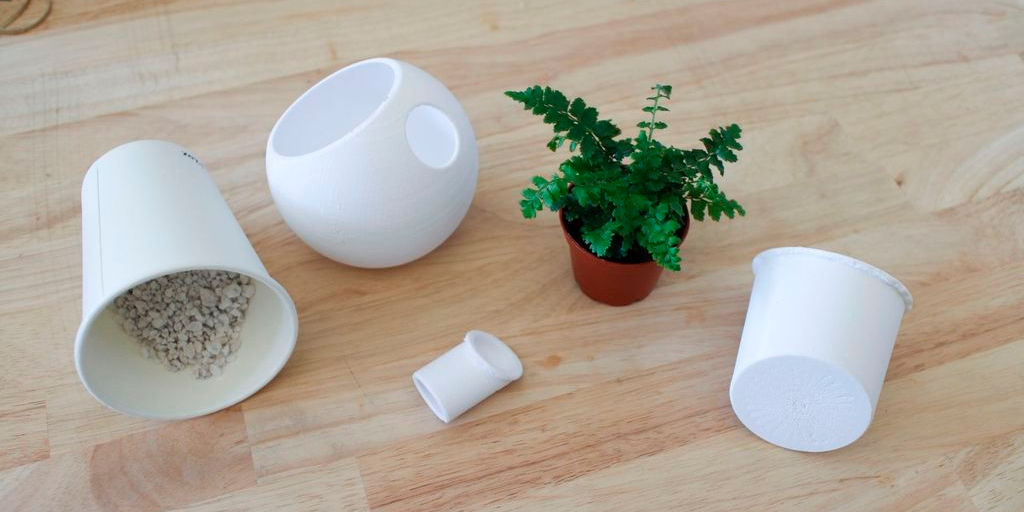
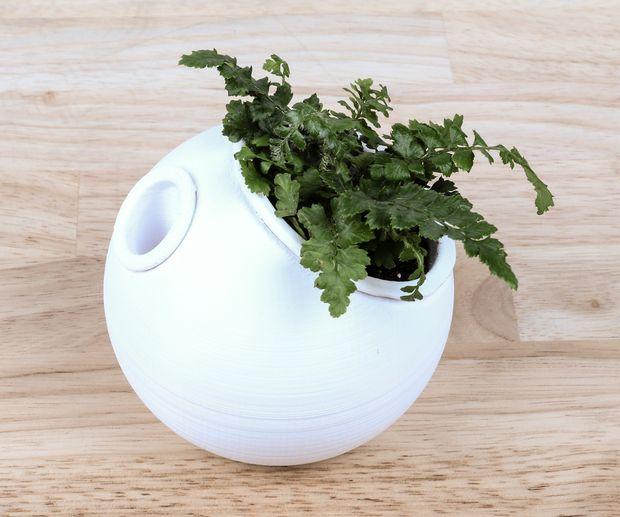
“Basically, it consists of a basin that keeps standing water and a cup with a perforated bottom that stays submerged in the water. The water in the basin wicks into the potting soil keeping it moist without drowning the plant. From what I gather, roots need water but they can’t be submerged in it for too long or the plant will die. The other danger with over-watering (I’ve heard) is that it can help propagate mold and fungus, which can also kill the plant.In my design, I created a sphere with two circular cutouts in it. A larger one holds the planter cup that snugly fits a 3” plant, and a smaller cutout is for a spout that keeps water from spilling everywhere when you fill the pot.”
First you download and print the STL files for this project. JON-A-TRON printed his planter on a Dremel 3D Idea Builder, and he recommends you use “solid infill” here so the pot won’t leak. Then you are ready to assemble the parts, which include a planter, a cup, a spout, and a bowl. Next, you put your plant in the planter (make sure you choose one that’s the right size with some room to grow). Placing some pumice gravel on the bottom of the cup allows the water to stay level with the top of the gravel. This way the soil will wick up the right amount of moisture when it needs it.
Step 4 has you simply enjoying the fruits of your labor as you watch your plant receive a constant level of low moisture to keep it healthy, happy, and growing. Looks like, with the help of 3D printing, you too can have a green thumb after all!
JON-A-TRON printed his planter in PLA, and says it’s held up for more than two months now with no leaks (so far). He notes that a local nursery seemed to think his design was sound “right kind of plant (the thirsty kind).” He added:
“I’ve lived in California for more than 10 years, but I grew up in Louisiana, so I know that stagnant water is a very bad idea in some climates. I would imagine that if you also made a cap for the spout to keep mosquitos from flying into the pot and laying eggs, you wouldn’t have to worry about it.”
Discuss this story in the 3D Printed Planter forum thread on 3DPB.com.