Get a Heads Up on the Next San Andreas Earthquake with this 3D Printable Slinky Seismometer

It is earthquake season again. And of course by earthquake season I mean it is that time of the year that Hollywood makes yet another movie about the West Coast being destroyed by the earth’s movement. Every year it seems that there is another disaster porn movie with a threadbare plot and lots of computer generated imagery of landmarks being destroyed. However, despite being silly movies, they do tend to lead to a bump in interest for the real issues that are being fictionalized. The new movie San Andreas, starring The Rock, may give moviegoers a temporary thrill, but it will also encourage a few viewers to learn about the real science of geology and seismology.
The Slinky Seismometer
By day Thomas Schrantz is a mild-mannered operations engineer for an internet company, but by night he fights crime, I mean studies geology for fun. In fact, Schrantz almost pursued geology as a career before becoming an engineer, and still considers himself an amature earth scientist. He was looking to acquire his own seismometer to monitor and study seismic activity but wasn’t able to find anything at the hobby level. All of the models available on the market were created for oil and gas exploration or mining, and any plans to build his own required metal fabrication facilities that he simply didn’t have access to.
 After weeks of searching Schrantz finally stumbled upon a low cost design intended for schools, called the TC-1 Seismometer. The TC-1 was a very basic design that used a clear plastic tube to hold, of all things, a Slinky attached to several powerful magnets, connected to an Arduino-based amplifier. The build looked simple enough for him, and he even found a few places where he could utilize his 3D printer. We spoke to Schrantz about his seismometer and he explained how he improved on the TC-1 design and how exactly the device works.
3D Print: – How did you go about re-designing the TC-1 Seismometer?
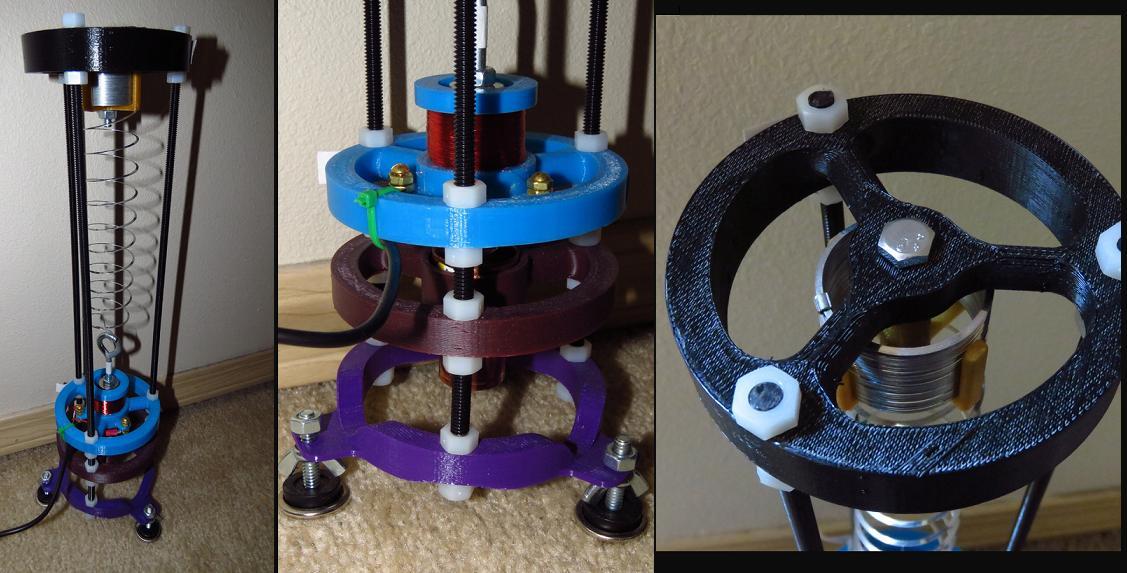
Thomas Schrantz: – I started by building a part to act as the pickup coil, using the specifications from the original design. The TC-1 plans called for cutting and gluing together some pieces of PVC pipe. I simply took those measurements and designed a piece that matched it exactly. After I tried to use it, I realized it needed a few improvements, so I added some support arms and the wings for the connection points. From there, I built a few other parts (The slinky retainer and the damper holder) to replace some of the trickier aspects of the original design. From there, I had my first seismometer.
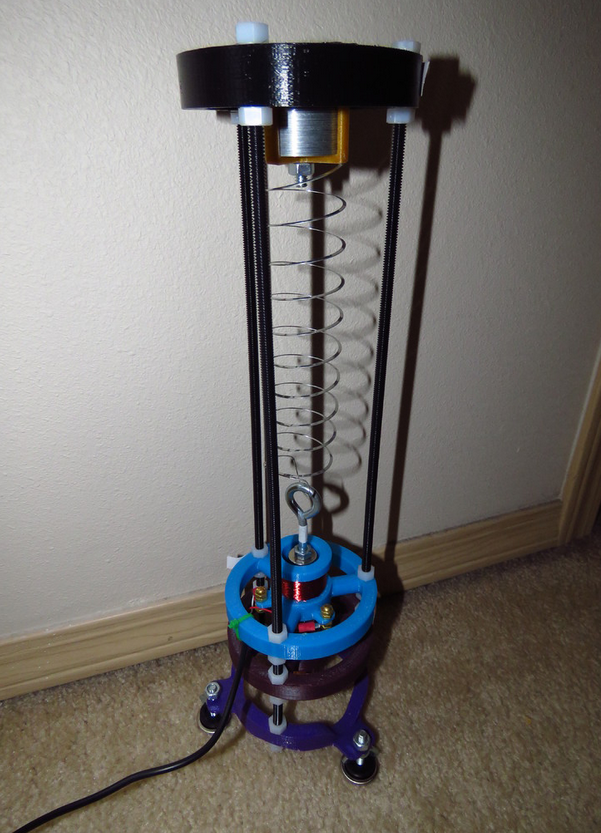
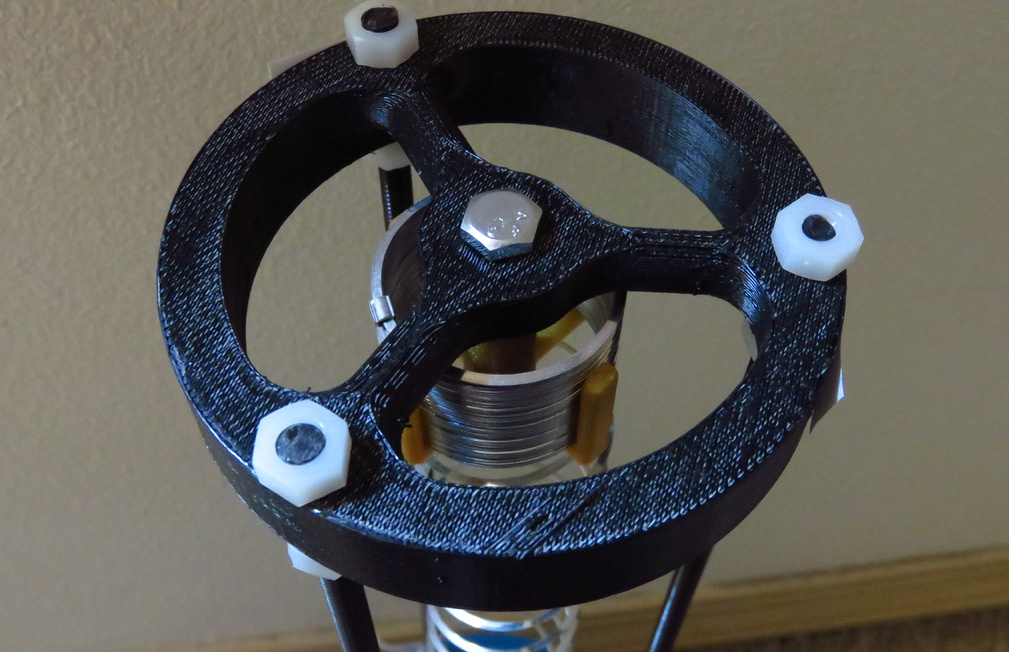 There were clear areas for improvement, however. The original design used a clear plastic tube as a support structure, which may have prevented a draft from affecting the signal, but it made it very difficult to set up and adjust. I set about modifying the design, keeping the basic features intact, but making it much easier to construct and adjust. I kept the basic parts from my original model, but fused them to rings. These rings, together with threaded rods, form the structure of the new design. The open tower makes it easy to adjust the magnets and Slinky inside, and the way the rings are held in place on the rods with hex nuts makes it easy to raise, lower, or level the individual pieces.
3DP: – Overall can you explain how it works and what exactly a seismometer does?
 TS: – At the center of the tower is a standard Slinky Jr. toy with a couple of very strong neodymium magnets hanging from the end. These magnets rest inside a coil of wire. When the magnets move, a small electric current is generated in the coil, and this current is amplified and fed into a PC, where it provides a readout. When there’s an earthquake, the magnets will bounce up and down ever-so-slightly, but enough to create a current that registers on the seismogram. (Technically, the rest of the device moves up and down around the magnets, because of inertia…) Although it’s made of 3D-printed plastic parts and has a toy in the middle, this is the same principle that many professional seismograms employ.
3DP: – How does it compare with other similar devices?
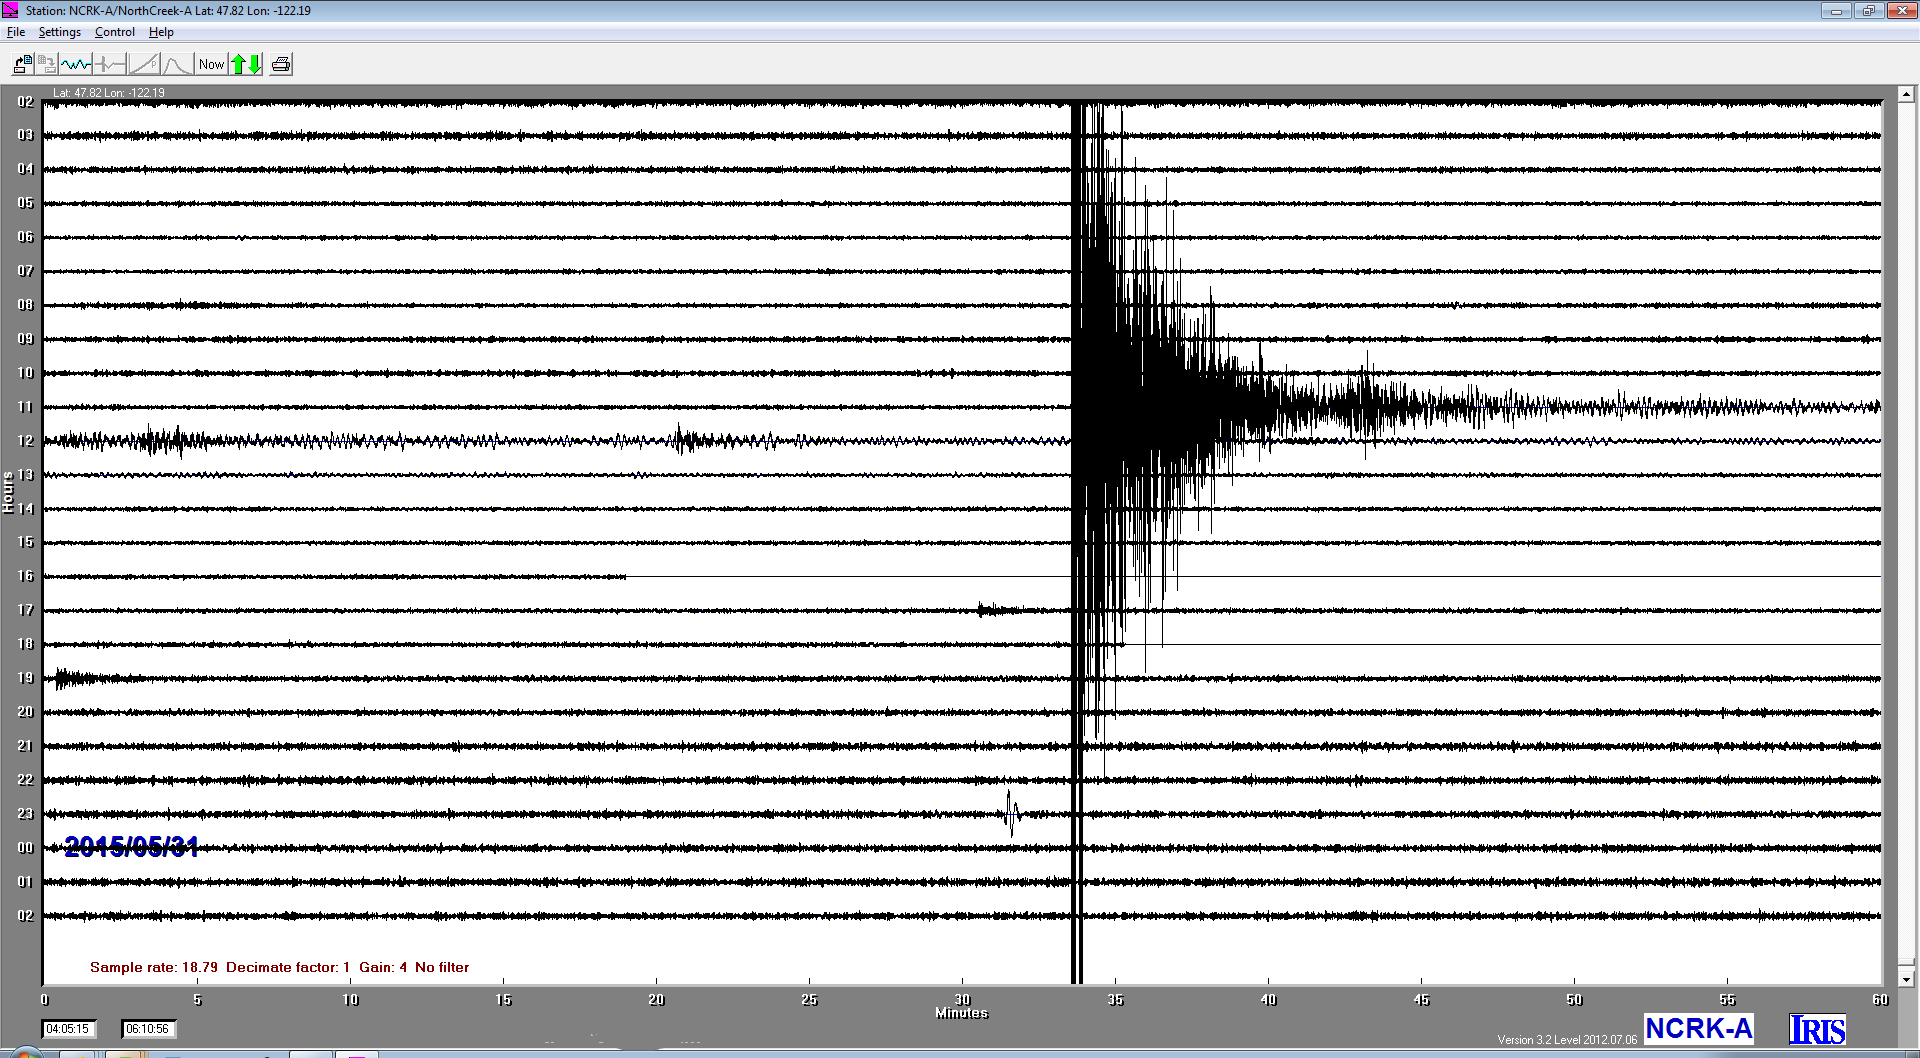
TS: – While it’s certainly not the highest quality instrument out there, it is definitely good fun to watch. I’ve picked up earthquakes from all over the world, from practically my own backyard, to Japan and Chile, even a few near Antarctica! I think I can pick up Magnitude 5 quakes from anywhere along the West Coast, and 7+ from almost anywhere in the world. It’s remarkable to think that an earthquake in Japan is capable of shaking my house near Seattle (ever-so-slightly) for hours.
-
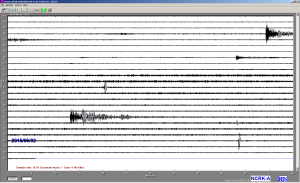
- A series of Magnitude 5-6 quakes that struck in the ocean off of Oregon within the same day

-
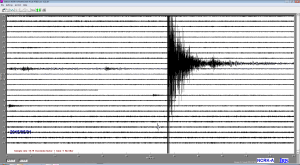
- A magnitude 7.8 that struck south of Japan.
If you want to construct a Slinky Seismometer of your own, you can download the 3D printable parts directly from Thingiverse. You will also need a few other items including some copper pipe to damper the spring motion, some copper wire, several 1/4 inch nylon threaded rods with nylon nuts (Metal will interfere with the device) and of course a Slinky Jr. Schrantz has included a list of everything that you need to construct your own device on Thingiverse. And if you decide to build your own, or if you have already built your own version show it off in the 3D Printable Slinky Seismometer forum at 3DPB.com.
Subscribe to Our Email Newsletter
Stay up-to-date on all the latest news from the 3D printing industry and receive information and offers from third party vendors.
You May Also Like
Precision at the Microscale: UK Researchers Advance Medical Devices with BMF’s 3D Printing Tech
University of Nottingham researchers are using Boston Micro Fabrication‘s (BMF) 3D printing technology to develop medical devices that improve compatibility with human tissue. Funded by a UK grant, this project...
3D Printing Webinar and Event Roundup: April 21, 2024
It’s another busy week of webinars and events, starting with Hannover Messe in Germany and continuing with Metalcasting Congress, Chinaplas, TechBlick’s Innovation Festival, and more. Stratasys continues its advanced training...
3D Printing Webinar and Event Roundup: March 17, 2024
It’s another busy week of webinars and events, including SALMED 2024 and AM Forum in Berlin. Stratasys continues its in-person training and is offering two webinars, ASTM is holding a...
3D Printed Micro Antenna is 15% Smaller and 6X Lighter
Horizon Microtechnologies has achieved success in creating a high-frequency D-Band horn antenna through micro 3D printing. However, this achievement did not rely solely on 3D printing; it involved a combination...