Thanks, Josh! Check Out These Tips from Authentise for Avoiding Pesky 3D Print Failures

![]() An online connection gives us access to so much we did not have years ago. The world is before us from our screens, whether that be a computer, tablet, or smartphone. Allowing us to do, learn, and purchase practically everything we need, our lives can be as streamlined as we wish. When it comes to taking on hobbies, projects, and new passions–once again–the world is at your fingertips. Nothing offers a better example of this than the maker community, which has steadily evolved into a culture of its own, inhabited by an enthusiastic population of innovators centered around digital design and 3D printing. We are all familiar with the excitement of embarking on a new project, and the euphoria that ensues while things are going well with a new invention or build. When things go awry and the 3D printing chips are down, it’s reassuring to know you have plenty of troubleshooting help–and sympathy.
An online connection gives us access to so much we did not have years ago. The world is before us from our screens, whether that be a computer, tablet, or smartphone. Allowing us to do, learn, and purchase practically everything we need, our lives can be as streamlined as we wish. When it comes to taking on hobbies, projects, and new passions–once again–the world is at your fingertips. Nothing offers a better example of this than the maker community, which has steadily evolved into a culture of its own, inhabited by an enthusiastic population of innovators centered around digital design and 3D printing. We are all familiar with the excitement of embarking on a new project, and the euphoria that ensues while things are going well with a new invention or build. When things go awry and the 3D printing chips are down, it’s reassuring to know you have plenty of troubleshooting help–and sympathy.
Often, just trying to figure out what went wrong in the first place is a test. For the novice especially, while they may be responsible for doing something wrong that can be quickly fixed–most often the equipment needs a nudge or another solution. Prevention is the best medicine, as well all know, and Authentise is working to help you beat the problems to the punch. Thanks to Joshua Cloward, a previous intern just bumped up to software developer, we’re getting a whole host of tips–the kind you may want to go to the trouble of 2D printing and taping on the workshop wall.
Josh begins by reminding us that most prints do fail simply because of poor calibration or the wrong settings regarding slicing. He points out, however, that the majority of his prints have failed due to bad adhesion. Here are some of the tips he feels certain will help you have a more enjoyable time at the 3D printer:
Tip #1 – Level the Z-Axis correctly
Starting off with a great trick to handle the challenging demands of the print bed, Josh recommends using a business card or stiff piece of paper to help in making sure the bed is level, as well as situated the proper distance from the printer head.
“I like to have a slight resistance against the card when leveling and try to make all points on the bed the same amount of resistance,” said Josh.
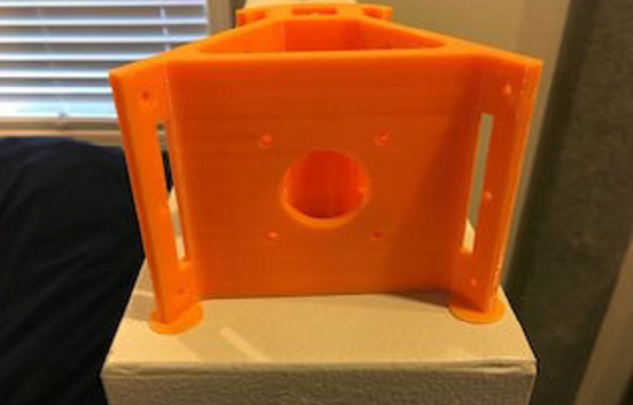
You are mainly calibrating the center of the bed, but also make sure each corner is level. Check your prints to make sure the bottom layer offers a flush outer perimeter and that is has a smooth texture throughout. Josh points out that you should be able to see the ‘exact paths of the print head.’ If it is instead all globbed together, this portends trouble removing the print from the bed.
“With layers like that it will be very hard to take your print off your bed and if the bed is too far it definitely won’t stick,” says Josh.
He recommends the use of blue painter’s tape, as well as air spray to act as a primer for glass or aluminum print beds. For those willing to put a few more dollars into this exercise, you should have good success with zebra plates and BuildTak, popular with many users.
Tip #2 – Slice for Success
Are your slicing settings helping or hindering? If you think you might need some adjustments in this area, here’s what to examine:
- First layer speed – note that this layer is most important. Josh recommends taking time here and lowering the speed as much as possible for success.
- Extrusion width – more filament may help your print stick better. By increasing the width by as much as 25-50%, you may experience much better adhesion, but proceed with caution.
“Be careful, as it can also mess with the height of the filament and cause your hot end to grind against the plastic,” says Josh. “Don’t overdo it!”
- Increase layer height – this can be of great help in quality of prints as well as offering shorter print times, but it could backfire with adhesion as well. If you see that happening, try setting layer height at .3mm or higher.
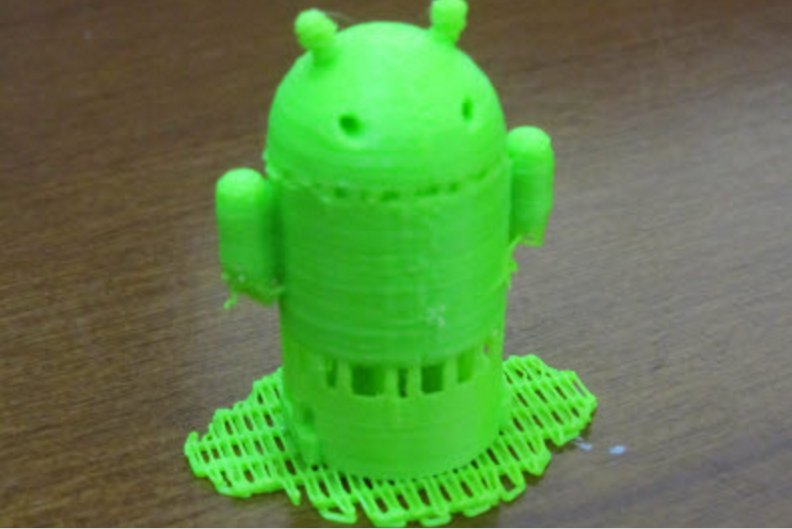
- Adding a raft or brim – this fix can solve your adhesion challenges, but it also uses a lot of extra filament. You may want to avoid this, according to Josh, unless there isn’t that much of the print touching the bed.
- Adding a skirt – does your printer takes a few seconds before filament flows plentifully? You may want to try a skirt, which can offering a very effective priming method.
- Adding more base layers – while not usually as successful, this is also sometimes worth a try.
Tip #3 Eliminate Corner Lift
Corner lift is a peripheral adhesion issue that also commonly plagues users. Also caused by improper bed leveling, with this problem you may see those outside corners rising up from the build plate in an annoying fashion after the print cools the material expands–and up it goes. You may want to try the following:
- Raft – these can provide additional surface area, with the extra strength causing your print to stay in its proper form. It does though, again, use extra filament.
- ‘Mickey Mouse ears’ – these are small discs that you add to the edge of the curling area.
“If you have modeling experience, one of the quickest and cleanest ways I’ve come across is adding what we call ‘Mickey Mouse ears’ onto whatever corner or side is curling up,” says Josh.
 These work like a raft, giving more connection to the bed–without the enormous increase in filament use. They come off easily through bending and snapping, allowing you to cut or sandpaper the resulting edge.
Tip #4 Lastly, Please Remain Centered
Josh leaves you with good advice overall. Don’t allow those prints to stray too far to the edge of the bed:
“Centering your print to the bed can work miracles.”
In the business of building tools to help 3D printing businesses, this is not the first time we’ve heard from the company based out of Singularity University in Mountain View, California, in terms of helping to avoid failed prints. Earlier in the year, we reported on Computer Vision, a software product that involves setting up a webcam. Once you leave, the software monitors your prints for deviations, and lets you know in case you want to pause the job from afar. We’ve followed this dynamic company also as they have also instituted processes and platforms meant to offer greater ease and copyright protection, as well as security tools and storage protection.
We thank Josh for his helpful tips, and wish him the best in his new position at Authentise. Discuss these tips and provide your own in the 3D Printing Tips forum on 3DPB,com.
Subscribe to Our Email Newsletter
Stay up-to-date on all the latest news from the 3D printing industry and receive information and offers from third party vendors.
You May Also Like
3D Printing Unpeeled: New Arkema Material for HP, Saddle and Macro MEMS
A new Arkema material for MJF is said to reduce costs per part by up to 25% and have an 85% reusability ratio. HP 3D HR PA 12 S has been...
3D Printing News Briefs, January 20, 2024: FDM, LPBF, Underwater 3D Printer, Racing, & More
We’re starting off with a process certification in today’s 3D Printing News Briefs, and then moving on to research about solute trapping, laser powder bed fusion, and then moving on...
3D Printing Webinar and Event Roundup: December 3, 2023
We’ve got plenty of events and webinars coming up for you this week! Quickparts is having a Manufacturing Roadshow, America Makes is holding a Member Town Hall, Stratafest makes two...
Formnext 2023 Day Three: Slam Dunk
I’m high—high on trade show. I’ve met numerous new faces and reconnected with old friends, creating an absolutely wonderful atmosphere. The excitement is palpable over several emerging developments. The high...